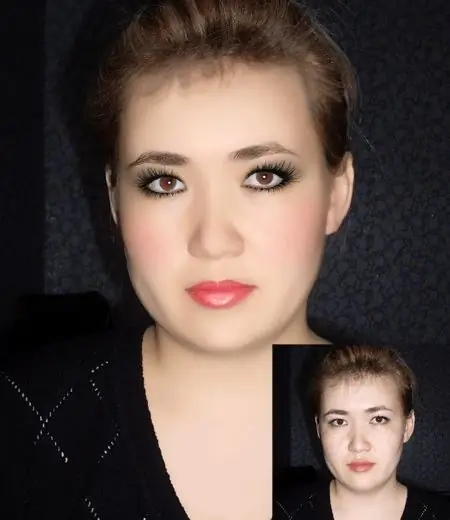
Why is it necessary and is it possible to tint the eyes in Photoshop? For example, you took a very good shot at your dacha. He is good to everyone, here's another way to touch up his eyes. After all, in the country you hardly put your usual makeup on your face. Well, this problem is very easy to solve by editing the photo in Photoshop.

Instructions
Step 1
Before starting work, you need to make sure that you have virtual makeup brushes (shadows, eyeliners, eyelashes, etc.) installed in your program. If not, you will find a large number of them on the Internet.
After choosing the brushes, download to your computer, unzip and install into the program. To do this, in the "Edit" menu go to the "Manage Sets" item. Select "Brushes" - "download", specify the path to the unpacked archive. Brushes have the *.abr extension.
Step 2
Open the photo you want to process. It is advisable to immediately increase the scale of the image in order to make it easier to work.
First, we will apply shadows to the eyes. Create a new layer and choose a brush color. This will be the shadow color (blue, gray, purple) that suits you best.
For work, select the "shadow" brush. Brush shapes differ in shape (top, bottom, top and bottom) and purpose (for the right or left eye).
Move the cursor to the eye and, pressing the keys ("left square bracket" - decrease; "right square bracket" - increase), select the brush size.
Click with the left mouse button - the shadows will stand on the eyelid. If they don't fit perfectly, use the Free Transform Tool.
Do the same work on the second eye, creating a new layer.
Step 3
After the shadows are applied, go in for the eyeliner.
Create a new layer, choose a brush shape, set the color to black. All further actions are similar to the previous step: adjust the size of the brush, apply eyeliner to the eye, trim with the Free Transform tool.
After finishing with one eye, move on to the other, and now you need to shade the lower eyelid. Hard eyeliner is not suitable for this, choose a soft brush of the appropriate shape. The color should not be saturated, preferably gray, brown purple….
Step 4
Well, in conclusion - the application of eyelashes to the eyes. Choose any shape, depending on how effective, catchy you want to get the photo. Follow the rest of the steps in the same way as in the previous steps.
A distinctive feature of this step: the eyelashes should lie on the eye more accurately, since the shape of the eye is individual. To do this, you need to bend them in exact accordance with the shape of the eyelid. To do this, in the free transform mode, right-click on the eyelashes and select "Deformation" from the drop-down list. With its help, precisely adjust the eyelashes to the eyelid.
Step 5
Your eyes are painted. Now you can view the obtained result on a normal scale. If the result is somewhat excessive or insufficient, correct the desired element. Good luck!


