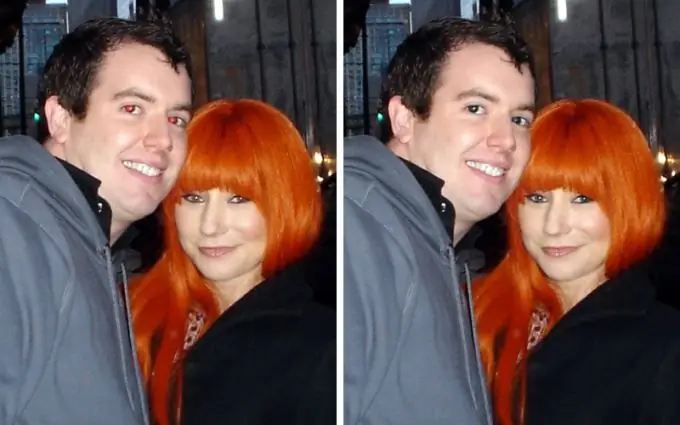
Red-eye is a common problem that often occurs when shooting with a flash in a compact camera. This often happens because this type of camera has the flash too close to the lens. Another reason is low-light photography: when the pupils dilate in the dark, they let in and reflect more light. Fortunately, fixing this defect is easy enough.

It is necessary
Tools: Adobe Photoshop 7 or higher
Instructions
Step 1
Open the image in Adobe Photoshop (File - Open) and make sure the layers palette is open. If this is not the case, call the layers palette from the "Window" menu (F7).
Step 2
At the bottom of the palette, find a small adjustment layer symbol. The symbol looks like a half white, half black circle. Click on it and select Channel Mixer. This will allow you to separately adjust the red, green, and blue colors in the image. Since in this case it is necessary to get rid of the red color, set the settings: Red - 0%, Green - 50%, Blue - 50%. After adjusting the colors, the faces in the photo will appear bluish-green. It should be so.
Step 3
Make sure the foreground color is black, then select a small brush with soft edges. Zoom in on the image with the Zoom tool and carefully paint over the pupils. As you paint over, they will turn red again.
Step 4
First, you should have the exact opposite of what you want to achieve. After that, the image needs to be inverted. Expand the Image menu, then select Adjustments and click Invert. Immediately after that, the image should be as it should be.
Step 5
Evaluate the result. If there is a red "halo" around the pupils or reddish fragments of the image appear, it means that during the painting process you went beyond the border of the pupil. Invert the image, take a smaller brush and erase everything unnecessary with white. Then repeat the inversion. You should now have a nice looking picture without the red-eye effect. Save the finished image.


