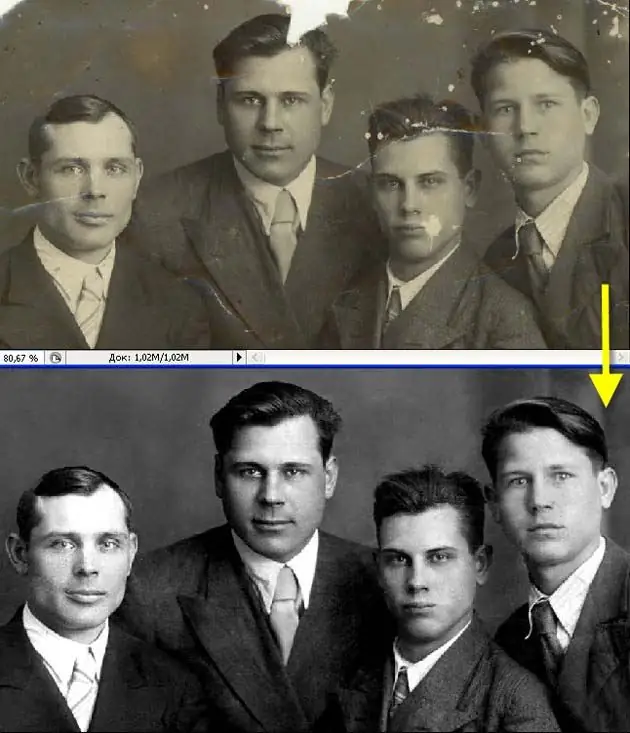
Unlike digital photographs, which can be stored on computer hard drives for many years, old film photographs wear out and age inexorably. That is why it is so important to be able to restore a photograph, which may be the heirloom of your family. Restoration is not such a difficult process if you use Adobe Photoshop.

Instructions
Step 1
Open the photo in Photoshop and duplicate the main layer (Duplicate Layer). Make the original layer invisible to work on the copy. Add a new adjustment layer (New Adjustment Layer> Levels), and then set the levels parameters - black to 7 and white to 243.
Step 2
Now with the Eyedropper Tool set to 5x5 pixels, click on the area of the photo from which you will sample the color, and then select a soft brush with zero pressure and size of 21 pixels. Carefully paint over any cracks and holes in the photo with the chosen color swatch.
Step 3
At this stage, retouch the background without affecting the image of the person. For the most accurate retouching, zoom in on the photo and sample the color for each crack separately by clicking on the area of the photo closest to the crack with an eyedropper. When the cracks are painted over, set the Blending Mode of the brush to lighten overlay and process the dark spots of the background, lightening them.
Step 4
Make the final background adjustments - soften the transitions between the tones by creating a new layer and smoothing the background shades on it using a large round brush (400-500 px). Set the opacity of the brush to 50% and use the eyedropper to select the color swatches as above. Once the background is fixed, zoom in on the photo and start working on the face.
Step 5
To retouch the face, use a brush with 70% opacity and size 25 pixels. Carefully paint over cracks, small imperfections and dark spots. Work your face gently and slowly until you are satisfied with the result. If the facial features are poorly preserved in the photo, you can use another photo of the same person in the same angle, if you have one, and copy some of the facial features from there, and then smooth out the transitions by adjusting the brightness, contrast and saturation.
Step 6
Merge the adjustment layer with a copy of the original layer, duplicate the resulting layer and open the filter menu. Select the Texture> Grain filter and apply it to the layer. Change the blending mode so that the photo is covered with even fine grain, which will make it look closer to that of the original old film shots. The finished photo can be converted to CMYK mode and printed.


