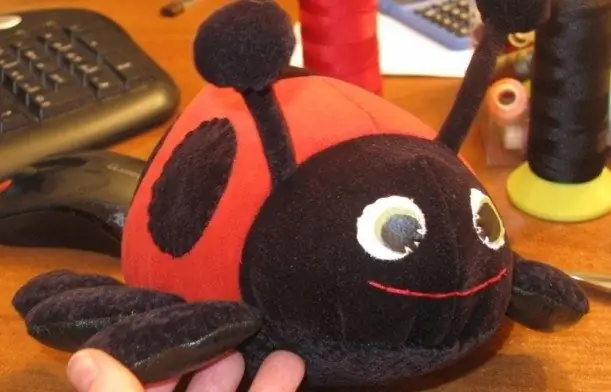
A colorful ladybug can decorate the interior of your apartment, as well as become your child's favorite toy. It is not at all necessary to go to the children's store and choose the one you like from the many toys. With a little free time and a little patience, you can sew a ladybug for your children yourself.

It is necessary
- - threads and a needle;
- - scissors and cardboard;
- - fluffy yarn;
- - the cloth;
- -buttons or beads;
- - stuffing for toys.
Instructions
Step 1
Sew a bag of the desired size from the red fabric. Gently stuff it with the prepared toy stuffing and sweep the open end with just noticeable stitches. To prevent the toy from falling apart in the child's hands, sew the edges on a typewriter. Just do not use white threads, as they will be too noticeable on red fabric.
Step 2
Blindstitch the corners of the resulting pillow with small folds that will give it a round shape.
Step 3
Cut two identical circles out of cardboard. Select the size of the inner and outer diameters, respectively, for the size of the torso of the future toy. Do not forget to cut the inner ring in the resulting circle. Connect the two circles with each other.
Step 4
Thread the fuzzy black yarn into the ring of the circle and start wrapping around the cardboard base. Having completely wrapped the template, proceed to the next row. Thus, loop until the hole is completely gone.
Step 5
Cut the threads just above the templates. Gently wrap the resulting bundle several times and tie tightly in a double knot. Pull out the cardboard base and trim the resulting pompom with scissors.
Step 6
Sew the pom-pom to the body of the toy. On top of the ladybug's head, attach two light buttons or two small pieces of light fabric that will act as eyes. You can sew on regular beads.
Step 7
Draw small circles on the black fabric that will be spots on the back of the ladybug. Cut them out carefully and sew them in various order on the back of the toy. If desired, the stains can be simply glued on.


