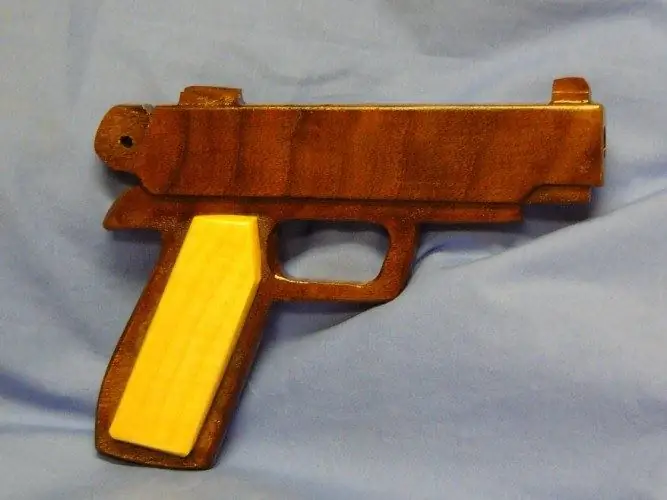
Military sports games with children can be a great way for them to demonstrate their fighting qualities, develop tactical skills and abilities. Weapons are an important piece of equipment for the game. It is not always possible to pick up ready-made models of machine guns and pistols, but this does not matter, because you can even make toy weapons from wood.

It is necessary
- - oak or pine board;
- - ruler;
- - pencil;
- - vice or workbench;
- - plane;
- - a hacksaw for wood;
- - jigsaw;
- - knife;
- - chisel;
- - grinder machine;
- - file;
- - sandpaper;
- - apparatus for burning wood;
- - varnish.
Instructions
Step 1
Find the right board for your gun model. It is best to use an oak or pine blank for this purpose. The thickness of the board should be about 30 mm. Examine the board and select an area on it that is free of knots, swirls and other defects. Use a hacksaw to cut the workpiece to a sufficient length and lightly grind it with a plane.
Step 2
Decide on the model of the pistol that will be the prototype for the toy. If you want to accurately recreate the contours of real small arms, use photographs or illustrations from military history publications. Find data on the actual size of the weapon model you are interested in. But you may well show your imagination and come up with your own design of a pistol.
Step 3
Draw the outline of the gun onto the piece of wood using a ruler and pencil. Secure the board in a vise and use a hacksaw or angle grinder to carefully saw out the gun along the lines you have drawn. At the same time, it is advisable to provide for a small allowance that will be needed for finishing the product.
Step 4
Give the rough outline a finer line. To do this, you need a grinder, file, chisel, and a sharp knife. Highlight on the workpiece all the main design details of a real pistol, including the barrel, bolt, grip, safety guard and trigger.
Step 5
Mark small details with a file and a chisel: front sight, fuse, notch on the bolt and handle. Try to act carefully and prudently so as not to spoil the future pistol by mistake.
Step 6
Finish the finished toy model of the gun with a file and sandpaper, smoothing out sharp corners and roughness. Individual details can be drawn additionally using a wood burning device. To give the gun a more aesthetic and complete look, cover the toy with two or three coats of dark varnish.


