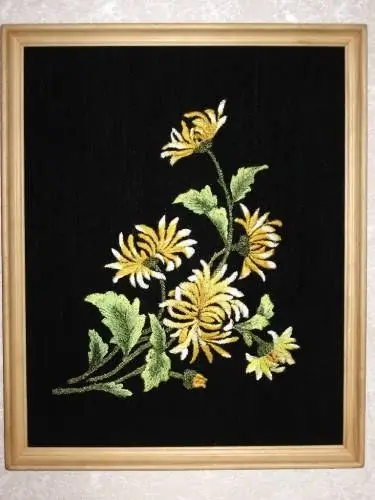
Stitch embroidery is the most beautiful technique in which you can create beautiful paintings and panels. This handicraft combines many secrets of folk traditions and is gaining great popularity in our time.

It is necessary
- - cotton fabric;
- - hoop;
- - floss threads, silk;
- - bobbin threads;
- - a needle;
- - scissors.
Instructions
Step 1
Stitching is used to make embroidery, in which the outline of the pattern is filled with stitches. It is performed in different colors of threads, on different fabrics. Mostly small floral patterns are embroidered in this technique. Usually, to create a picture, a double-sided surface without flooring is used, in which the number of stitches is not counted in advance. They are applied to the fabric pattern parallel to each other, evenly filling the contour.
Step 2
Fill in patterns or elements with uneven contours, for example, leaves, with artistic oblique satin stitch. The stitches should be at different levels and at different lengths. Sew round objects (fruits, berries) with a straight stitch. Before this, the outline of the pattern must be sewn with a "needle forward" seam. Artistic oblique and straight stitch is embroidered with colored threads or silk.
Step 3
To create volume in the embroidered picture, use a single-color shaded stitch. Perform it with an oblique or straight stitch, threads of the same color, but take several shades (from light tone to dark). Use shiny silk threads or cotton floss for embroidery. Do not pull the thread tightly. The upper stitches should be weaker than the lower ones so that the bottom stitches are not visible on the right side of the fabric.
Step 4
Small elements are usually embroidered with satin stitch. To do this, take a floss or silk in one thread. The thinner the thread, the more beautiful the pattern will be. Place the stitches tightly, one to the other, so that the ends do not touch, but go one after the other. Make each seam in the middle of the adjacent stitch, stepping back a little, under the thread of the previous seam. Short stitches will work best. A shiny pattern is obtained on the front side of the satin surface, and small seams on the wrong side.
Step 5
In order for the drawing to be voluminous, use a straight surface with flooring. First, make the pattern with thick threads in two layers. Use a straight satin stitch and then sew perpendicular stitches to create a decorative embroidery surface.
Step 6
To sew a welt stitch, sew the outline of the pattern first with a needle-forward stitch. Make an incision near the mold, insert the needle from the wrong side and stick it from the right side into the fabric. The result is narrow, twisted stitches. This type of surface is used for embroidery in the middle of a flower.
Step 7
To embroider large elements with satin stitch, use the “stitching” technique. In this case, the stitches overlap from one edge of the pattern to the other. Each stitch is additionally secured with small perpendicular stitches.
Step 8
For the background of the picture, choose soft, pastel colors (gray, gray-green, cream, gray-blue). All the details of the drawing are clearly distinguished on them. Black and white create a strong contrast. The main pattern and background should be in harmony with each other.
To embroider the picture, start with the large details of the drawing.


