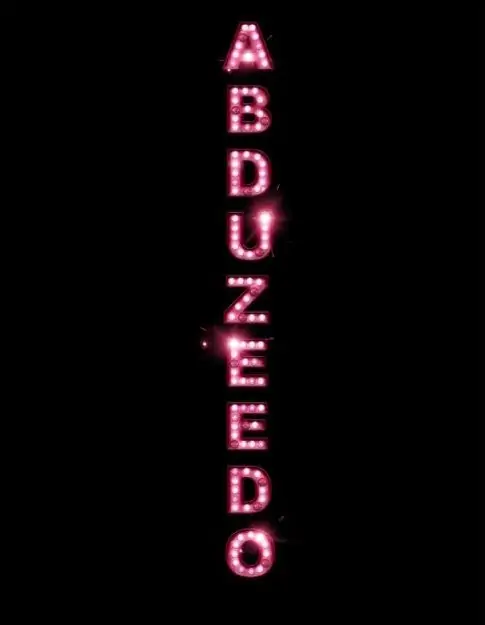
In Photoshop, you can not only draw pictures and retouch photos, but also create original and vivid text effects that will help you make a beautiful and unusual inscription for an advertisement, website or blog. After spending just an hour of free time, you can draw shiny text in the style of colored neon signs in Photoshop.

Instructions
Step 1
Create a new document in Photoshop and fill the background with black. Select the Vertical Type Tool from the Toolbox and enter any text you want to make shiny. After that open the Layers menu and select the Layer Style section.
Step 2
In the window that opens, select the Drop Shadow tab. Set the blending mode of the shadow to Multiply. Now go to the Inner Shadow tab and add an inner shadow to the text in Color Burn mode. After that, select the Bevel and Emboss tab in Pillow Emboss mode, and then on the Color Overlay tab, check the box by specifying the desired color.
Step 3
Stroke the text with any color that is darker than the main font color by clicking on the Stroke tab and choosing a stroke thickness (one pixel is enough). Now set the Outer Glow Opacity to 62% and the Blending Mode to Color Dodge. Click OK.
Step 4
Go to the Image menu and choose the Adjustments> Hue / Saturation option. Select the Colorize option, and then change the color tone to one that matches the color scheme of your text. Duplicate the layer and remove the shadow and outer glow from the Layer Style menu. Then from the Filter menu choose Blur> Gaussian Blur with 20 px Radius.
Step 5
Change the Blending Mode of the layers to Color Dodge, and then use a soft eraser with zero hardness and small size to process the image, adding "lights" to the surface of the letters. For more realism, make some lights burned out, and to make them more realistic, you can copy the image of the neon light from a photo of any neon sign and use it as a brush.
Step 6
From the Layer Style menu select the Drop Shadow tab and set the shadow for the letters. Add flashes on some of the letters using the corresponding brushes in the form of bright highlights. Change the layer blending mode to Screen.
Step 7
Duplicate the flashes and place them in the desired places above some of the letters. Blur the image with a small radius Gaussian Blur filter. Add any background texture to the image on a new layer to get a nice background behind the text, and apply a glow effect to it.


