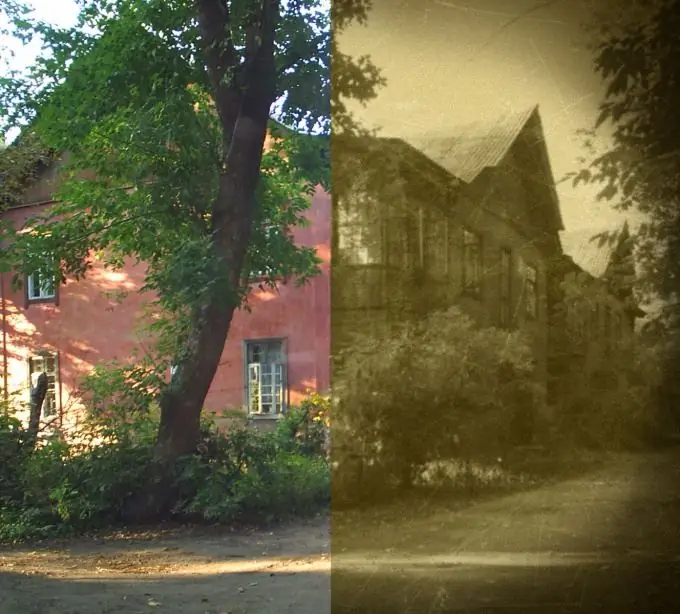
What tricks designers do not use to make the image look unusual. One of the most frequently used methods is artificial aging of a photo. There are many ways to mimic the style of an old photo. Basically, they boil down to changing the color gamut of the image and adding noise.

It is necessary
- - Photoshop program;
- - texture with scratches;
- - the photo.
Instructions
Step 1
Load the image you want to age into Photoshop. Do this with the Open command from the File menu. Double click on the icon of the required file in the explorer window.
Step 2
Create a new layer using the New command from the Layer menu.
Step 3
In the palette "Tools" select the Paint Bucket Tool ("Fill") and fill the new layer with color # 51430c. To do this, click on the colored square in the "Tools" palette. In the palette that opens, paste the color code into the bottom field. Click OK. Left-click on an open document.
Step 4
Change the blending mode of the layer you just created from Normal to Exclusion. To do this, right-click on the layer and select the Blending Options option from the context menu. In the window that opens, select the Exclusion blending mode from the drop-down list. Click on the OK button.
Step 5
Duplicate the newly created layer with the Dublicate Layer command from the Layer menu and change the blending mode of the copy layer from Exclusion to Color.
Step 6
You can add shaded areas around the edges. To do this, create a new layer, in the "Tools" palette select the Brush Tool ("Brush"). In the settings of the brush parameters, the window of which is located under the main menu on the left side of the program window, set the Hardness parameter to zero, and set the Master Diameter depending on the size of your image. The brush should be about a quarter of the size of the photo.
Step 7
Choose the darkest color that is present in your picture. Place the edge of the cursor, which should look like a large circle, over the corner of the image and left-click. Change the Blend Mode of the Darkening layer from Normal to Multiply.
Step 8
Make an imprint of the visible layers of the image using the keyboard shortcut Ctrl + Alt + Shift + E.
Step 9
Apply a blur to the resulting layer. To do this, select the Gaussian Blur filter from the Blur group of the Filter menu. In the settings window, set the value of the blur radius equal to one pixel.
Step 10
Add noise. This can be done by choosing the Add Noise effect from the Noise group of the Filter menu. In the noise settings window, check the Monochromatic checkbox. Select the value of the Amount parameter by eye. Most likely, five to six percent will be sufficient.
Step 11
Add scratches to your photo. To do this, search the Internet for a suitable picture with scratches. Open it in Photoshop, select it with the keyboard shortcut Ctrl + A. Copy the picture using the shortcut Ctrl + C. Click on the window with the picture you are processing and press the key combination Ctrl + V. Change the blend mode of the scratched layer so that your photo is visible through this layer. The blending mode can be selected here experimentally. Stop at the option that seems most suitable to you.
Step 12
Save the modified photo using the Save As command from the File menu.


