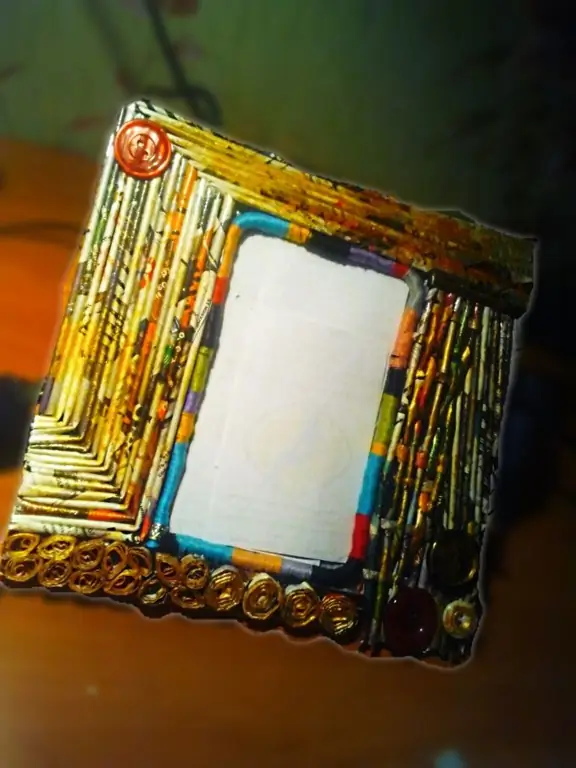
It happens that a pile of unnecessary old magazines is lying around at home, but the hand does not rise to throw them away. No problem! You can make a wonderful photo frame out of them.

It is necessary
- -old unnecessary magazines
- -PVA glue
- - thick cardboard or thick magazine
- -acrylic or other varnish
- -scissors
- knitting needle
- -stationery knife
- -acrylic paints
- -file
- -buttons, beads, threads, etc.
Instructions
Step 1
Cut out rectangles of equal size from the sheets of the magazine. For example, 10 cm by 15 cm. Wrap the corner of the sheet on a knitting needle, wind the rest of the paper, secure at the end with glue. You will need a lot of such tubes, it all depends on the size of the frame, the size of the spoke and the length of the tube itself.
Step 2
Decide on the size of the frame. After you decide what size you will have, take thick cardboard. Using a pencil, draw the base on the cardboard at the selected size. Cut 2 pieces of cardboard for the base. One piece will remain unchanged, but the other is still worth working on. Place the photo of your choice in the center of the base, so that the edges on the two parallel edges are the same. Circle with a pencil and then cut out. Glue 2 parts (one solid, the other with the cut out center), matching the edges exactly, on three sides. Leave one side unsticked so you can insert a photo.
Step 3
In order to get the final version of a photo frame from magazines, you need to glue magazine tubes to the base. Glue the tubes as tightly as possible to each other, making an interesting pattern. To make a pattern, glue the straws in different directions. You can also twist them to create interesting circles. Leave the photo frame alone until it dries completely.
Step 4
When everything is dry, you can start decorating the newspaper frame. A newspaper frame can be decorated in completely different ways, but you need to start with painting. Paint the frame with acrylic paints - gold, silver or any other. After painting, the photo frame should dry.
Step 5
Use super glue to attach beautiful buttons, shells, rhinestones, ribbons or other accessories to the photo frame. After adding accessories, they can also be painted with acrylic paint. Glue colored paper or fabric on the back of the frame.
Step 6
Cut out a small rectangle from thick cardboard, measuring 7 cm by 3 cm. Divide the long side into 2 and 5 cm, draw a line with a pencil, bend the cardboard along the line, decorate it as desired. Glue a small part of this cardboard to the back of the photo frame, so you get a footboard on which the newspaper frame itself will stand.
Step 7
Cover your photo frame with varnish. When the frame is dry, it is ready, you can insert a photo into it and admire a wonderful and useful product!


