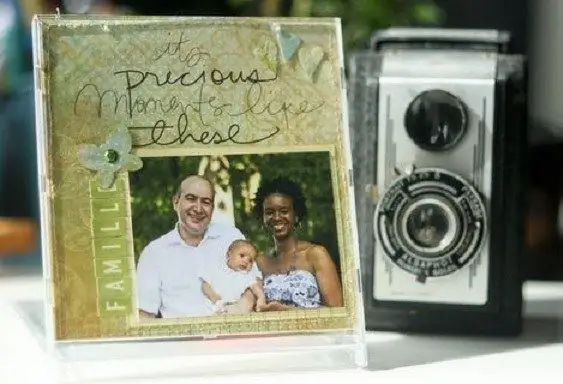
Photo frames can be made with your own hands from scrap materials that can be found in many homes. Use cardboard and leftover building materials, and you can decorate the photo frame and make it exclusive with pieces of fabric, buttons, beads, shells and even pencils.

How to make a photo frame from a CD box
A transparent CD box can be found in almost every home, it can be used to make a simple but very stylish homemade photo frame that can be placed on a table or on a shelf.
Making this frame will require a minimum of skills and only a few minutes of free time.
So get the CD case. Take out the inner part from it, to which the disk is attached, and remove all enclosed sheets. Leave only a square sheet to serve as a template for making a mat. Attach it to the cardboard and trace along the contour. Having retreated 1-1, 5 cm from the edges, draw parallel lines, cut out a mat along them.
Attach this detail to the photo and cut off the excess. Apply PVA glue to the cardboard mat and glue the photo. Insert it into the lid of the box.
To place the photo frame on a surface, make a leg. Cut a rectangle about 3 cm wide and about 15 cm long. Fold back the top and bottom of the piece. Glue the top to the photo and the bottom to the box. The frame is ready.
How to make a soft photo frame
The simplest and most affordable material for making a frame is, perhaps, cardboard. You will need:
- durable and thick cardboard, consisting of several layers;
- glue;
- stationery knife;
- a simple pencil;
- metal ruler;
- scissors;
- synthetic winterizer;
- the cloth.
Attach the photo to a piece of cardboard and trace around it with a simple pencil. Draw parallel lines, 3 cm back from the outline, and cut with a utility knife. Make another piece of the same size.
To hang the frame on the wall, attach a piece of thick wire to the part.
Having retreated 4-5 cm from all sides, draw a rectangle on one of the parts and cut it along the contour with a clerical knife. This detail can be not only rectangular, it is possible to give it absolutely any shape you wish. The basis for making the frame is ready, now it needs to be decorated.
The base for the photo frame can be covered with almost any fabric, but it is better to use denim (denim), felt, thick knitwear or other fabric. To make the frame three-dimensional, glue a synthetic winterizer. Attach a blank to it and trace along the contours. Cut out the part and glue it to the base with Moment glue or hot glue using a special gun.
Then attach the piece to the wrong side of the fabric and trace along the contours with a pencil. Cut out, leaving 2 cm on each side for hem. Cut the corners on the inside of the workpiece, and cut the outside at an angle of 45 degrees.
Apply glue to the wrong side of the piece. Attach the fabric to the right side with padding polyester and fold back the seam allowances. Press down on the fabric and let the part dry for at least 2-3 hours. The frame covered with fabric can be decorated with beads, buttons
After that, apply PVA glue along the edge of the back of the frame on three sides and attach a part with a hole for a photograph, press down with a load and leave the product to dry for about a day.


