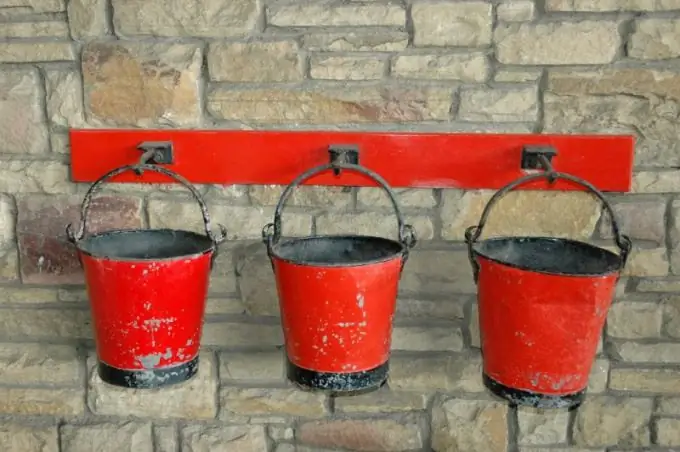
The bucket can be part of a still life, it can be seen in book illustrations or in genre sketches. When drawing, it is very important to convey the shape and volume of this object. In a drawing with a simple pencil, this is done using strokes made with different pressure and in a certain direction. In painting, volume can be conveyed using different shades of the same color. But first of all, you need to make a sketch.
It is necessary
- - paper;
- - pencil;
- - watercolor, gouache, pastel, etc.;
- - a bucket or a picture with its image.
Instructions
Step 1
Consider the bucket. Think about what it looks like the most. Any object can be represented as a combination of geometric bodies. The shape of the bucket most of all resembles a truncated cone, which lacks one of its bases.
Step 2
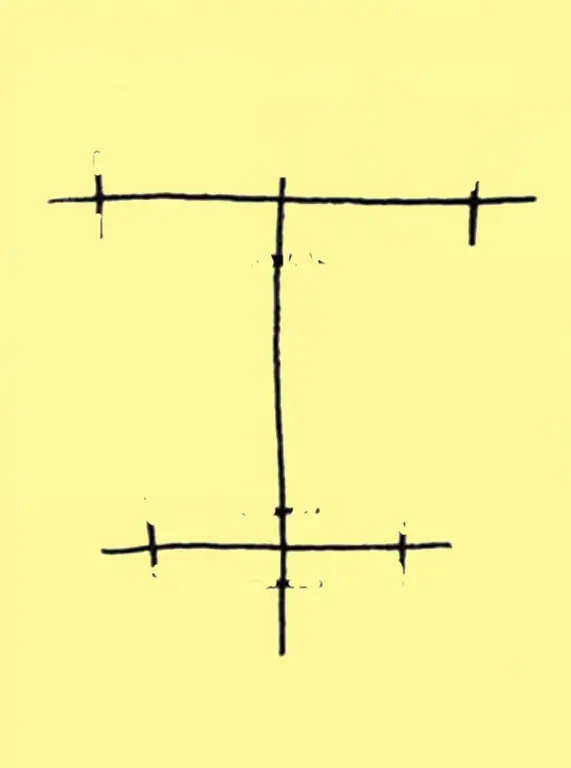
Determine the approximate ratio of the bucket height, the radius of its bottom and the uncovered top. If your drawing will only have this item, place the sheet vertically. Draw a vertical line with a thin, hard pencil so that it divides the sheet into two equal parts.
Step 3
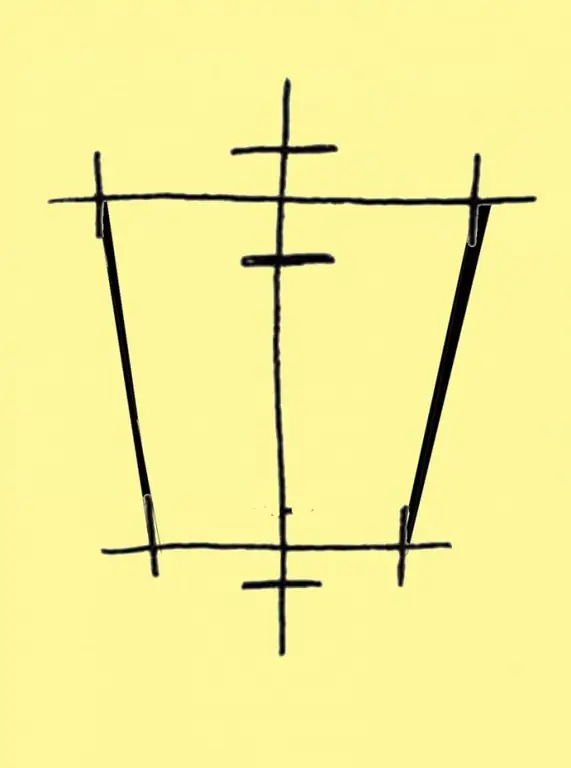
Mark the bucket height with dots on the centerline. Draw 2 horizontal lines through the marks. Set aside the approximate radii of the bottom and top edge on them on both sides of the axial. Connect these points in pairs. You have a trapezoid.
Step 4
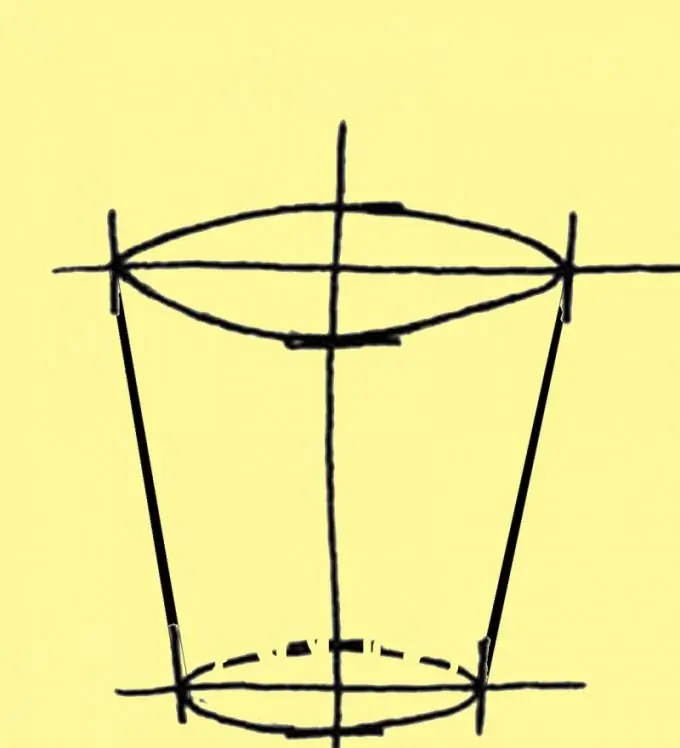
Take a close look at what the bottom and top of the bucket look like. Imagine them on a plane. You will notice that the top is an oval shape. It is the wider the lower the object is in relation to your eyes. The line connecting the bottom and the side part looks like an arc, the convex part of which is directed downward. For an inverted bucket, everything will be the other way around - the bottom will seem to be an oval, and the visible part of the edge will appear as an arc. But in any case, the curvature of the upper and lower lines will be approximately the same.
Step 5
To draw a beautiful oval, set aside equal small segments up and down along the axial from the place of its intersection with the diameter of the edge. Connect their ends with the ends of the diameter with smooth curves so that the narrow parts of the oval do not turn out to be too sharp. Try to be symmetrical.
Step 6
Draw an arc to indicate the line where the bottom meets the side surface. To make it more precise, you can draw an oval at the bottom, just like you depicted the top edge. Just outline the invisible part with a thin pencil.
Step 7
Mark the position of the handle. It attaches to the "ears" at the top of the bucket. Pay attention to how many "ears" are visible. If there are two of them, then they are located strictly on the sides. One can be anywhere. The handle is an arc. When both attachment points are visible, and the handle itself is raised up, it looks like an even and symmetrical arc, the most convex part of which is on the center line. In any other position, the curvature of this part of your "nature" depends on the angle from which you look at it. Draw a double line around the handle.
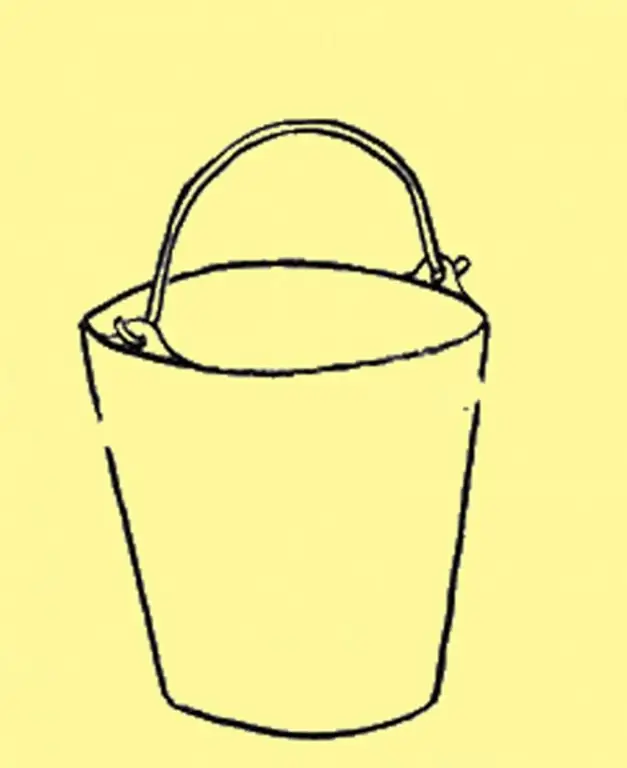
Step 8
The moment has come to transfer the volume of the bucket. See where the light is coming from. The material your object is made of also matters. If the bucket is metallic and shiny, see where the lightest spot is. Draw its outline on the drawing.
Step 9
Apply shading. Pencil strokes can go in two directions - from the bottom to the top edge or parallel to the visible bottom line. In the first case, at the bottom of the bucket, the ends of the lines almost touch each other, and at the top they diverge. In the second case, the strokes run parallel to the lower arc. At the bottom they are dense. As you get closer to the top edge, the lines become thinner. Remember to leave the shiny spot light.


