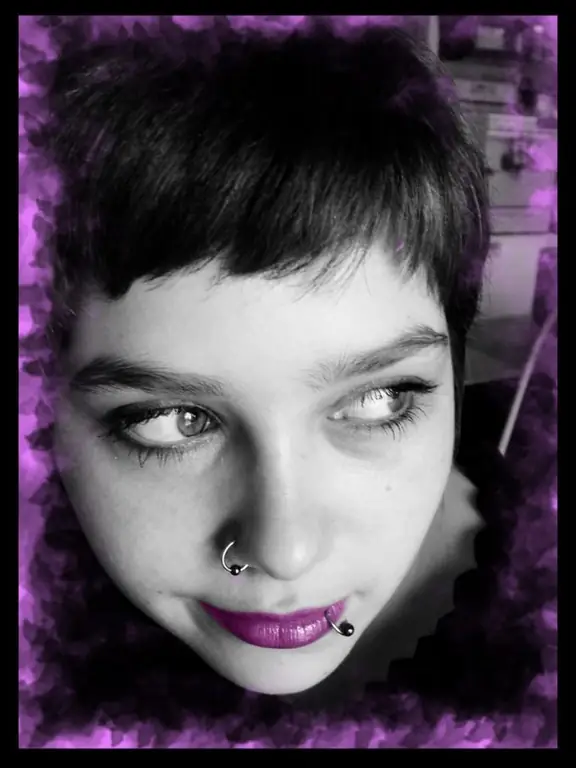
Most subcultures have unique external features through which members of these subcultures define their identity. For example, for the so-called "emo" one of the main attributes is a black and pink palette in clothes and other accessories. With the help of these instructions, you will learn how to transfer this palette to graphic images.

It is necessary
Adobe phototshop
Instructions
Step 1
Launch Adobe Photoshop and open the photo to be processed in it. In the described case, black and white photography is initially used, moreover, the main idea of the author of the article assumes that the original image should be black and white. Therefore, if your photo is in color, read the next step of the instructions, if not, you can skip it.
Step 2
Open the HueSaturation menu. To do this, click on the Create new fill for adjustment layer icon located at the bottom of the layers panel and select HueSaturation from the drop-down menu. A new menu will appear above the layers panel, find the Saturation slider in it and move it all the way to the left. Select both existing layers, right-click on them and select Merge Layers from the list that appears
Step 3
Select the Rectangle Tool (hotkey U, switch between adjacent elements - Shift + U) and use it to create a black frame on the photo with four rectangles
Step 4
Create a new layer and place it under the layers with the frame created above. Select the pink color and then the Brush Tool (B, Shift + B). Select the Watercolor brush (found under Natural Brushes 1). Use the "[" and "]" keys to set the required brush size. Create approximately the same frame as shown in the picture
Step 5
Select one or more elements of the photo, which will then be repainted in pink. In this case, these are the lips of the girl. Select the layer with the photo. Activate the Pen Tool (P, Shift + P) and use it to circle the required fragment, right-click on the selection and select Make Selection from the menu that appears. A new window will appear, make sure the Feather Radius is set to "0" and click OK
Step 6
Click on the Create new fill for adjustment layer button again and select Color Balance from the list. A new window will appear above the layers panel, rotate the sliders in it so that the fragment of the photo turns pink, or even better, so that it matches the frame created in the fourth step of the instruction
Step 7
Save the result by clicking the File> Save as menu item, specifying the path, name and format for the new file in a new window, and finally clicking "Save".


