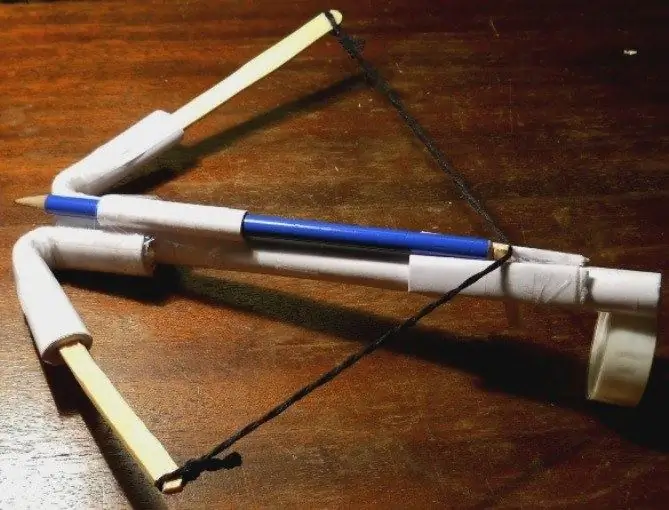
Sometimes it takes a lot of time, materials and effort to do something with your own hands. But there is also an easy way to please your restless child and keep him busy for a while. For example, teach him how to make a paper crossbow.

What you need to make a crossbow
To make a paper crossbow, you will need:
- 10 sheets of A4 paper;
- scotch tape;
- pencil;
- ice cream sticks;
- scissors;
- thick strong thread.
First of all, you need to make a crossbow body, which consists of:
- shoulders;
- the main part, which is called the bed;
- trigger mechanism.
Below you will learn how to make a paper crossbow with your own hands. If you want to see this process visually, after reading the instructions, watch the video about the manufacture of this craft.
Stage one: making the shoulders
Take four sheets of paper, fold them in half along the long side, and cut along that fold. Now take one half made up of four cut sheets. Twist them very carefully into a tube around the pencil, and secure the edge with tape so that it cannot unwind. It is best if you wrap the tape around the middle first and then around the edges.
Take the rest of the cut paper and twist the tube again. To make it easier to do this, place the pencil farther away from the edge, fold the paper around the pencil and leave some paper to fit under the pencil. Start twisting a tight and even tube.
Next, measure four centimeters off the ice cream stick and on the tubes. Now insert the sticks into the tubes up to the mark and break off the rest along the mark. Now take two more sticks and insert them into the tubes on the other side, perpendicular to the already inserted sticks. Then wrap the duct tape around the paper tubes so that they cannot break or unwind. It will also give them a springy feel so your arrows will fly. After that, bend the tubes around the four centimeters mark.
Stage two: making the bed
You will need five sheets of A4 paper. They need to be twisted along the short side. To make it easier to do this, use a pencil again. Then secure the end of the tube with tape.
Now connect the shoulders and the bed. To do this, one end of the large tube must be made flatter. Then take the bent tubes and attach to the flattened end. It is best to take one at a time and tape them together so that nothing falls apart. Do not feel sorry for the tape in this place, as this is the most mobile part of the crossbow.
It is necessary that the thread does not dangle, but, on the contrary, draws the shoulders of the crossbow to each other.
Pull the string, to do this, tie one end of the thread to one shoulder of the crossbow, then leave the length from one end to the other plus two centimeters and tie to the second shoulder. Thus, you have a crossbow mask.
Stage three: making the trigger
Pull the string down to form a square, and mark this area with a pencil. Then use a paper knife or other sharp object to cut through the small hole where the mark is. It is necessary that the slot on the bottom side is slightly larger than the top so that the trigger has a stroke.
It should be borne in mind that an already grown-up child (schoolchild) can use the crossbow.
Make the trigger itself from a small stick, which you insert into the slot, a small tip should remain on top, and a larger one on the bottom so that it is convenient for you to move it. You need to make two more small tubes and fix them on top next to the trigger so that arrows can be inserted there. Insert an arrow (pencil) and check the resulting crossbow. Be careful, as with archery, care must be taken with the crossbow to avoid the possibility of injury. Before using it, be sure to explain the rules of its safe use to your child.


