You can get a fuzzy photo both on an amateur and on a more professional camera - and in any situation, a fuzzy frame will upset the photographer, especially if there are no more duplicates of such a frame in the camera. Do not rush to get rid of such frames - if the blur is small, you can cope with it by performing a few simple actions in Adobe Photoshop, available even to beginners in photo processing. How to fix a blurry photo?

It is necessary
Adobe Photoshop program
Instructions
Step 1
First of all, open Photoshop and load the photo that needs correction into it (File> Open …). You can also open a photo by dragging the file with the mouse cursor directly into the open Photoshop window.
Step 2
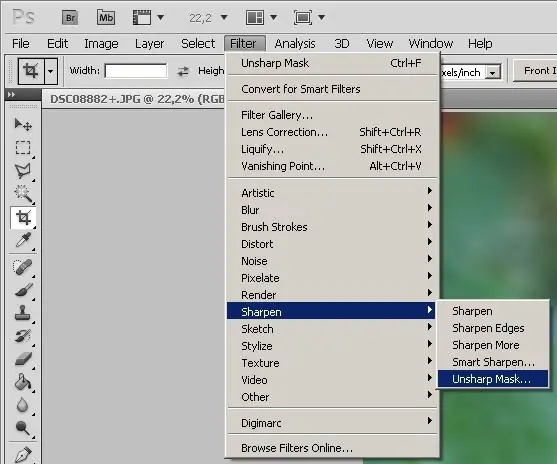
If the photo requires color correction, adjust its levels (Image> Levels), and then open the Filter menu. In this menu, select the Sharpen section and click Unsharp Mask in the list that appears. You can also choose Smart Sharpen instead of Unsharp mask.
Step 3
The last filter will improve clarity and adjust it. After selecting the filter, the Smart sharpen window will open, in which you will see the uploaded photo and several parameters that can be adjusted.
Step 4
Move the sliders on the Amount and Radius bars, and also select different settings (Settings) until the result of the clarity settings suits you. In the Remove section, select Gaussian Blur. After adjusting the clarity of the photo, click OK.
Step 5
The photo has become much sharper than it was - now you can save it to your hard drive using the File> Save as …
Step 6
If the result does not suit you for some reason, and you have already clicked OK in the filter, you can undo the changes - in the History window, undo the last actions, among which there should be a filter you configured.
Step 7
After canceling the filter and affecting the photo, you can restart Smart Sharpen and re-adjust the image in the photo.


