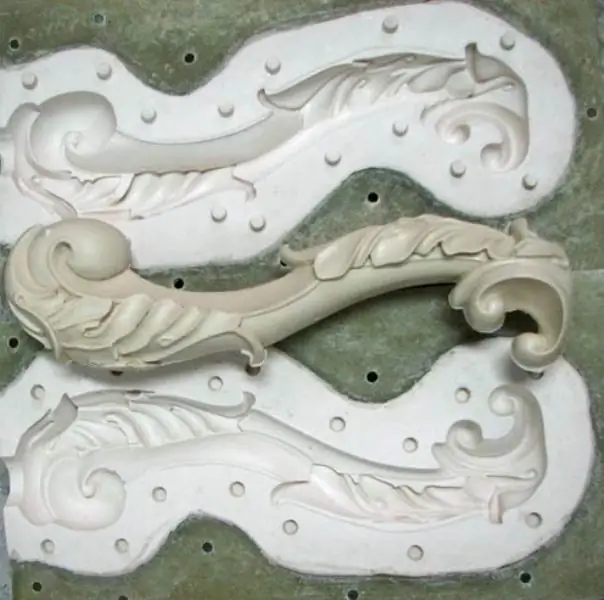
The economic efficiency of the plastics processing industry largely depends on the quality and accuracy of the main type of technological equipment - injection molds. The wrong choice of design solutions, calculation errors and violation of the mold manufacturing technology can lead to a decrease in the quality of the final product. This applies both to large firms that manufacture plastic products, as well as to small businesses engaged in this activity, or even home craftsmen.

Instructions
Step 1
Opt for the technology of making a simple flexible form, which consists of two parts. A two-component cold-cure polyurethane is used for this mold.
Step 2
Make a container for pouring. To do this, use any hard material: chipboard, fiberglass, wooden planks. Even the Lego constructor will do. If necessary, you can also select a ready-made container or box for the container, suitable for the size of the future product.
Step 3
Glue the shell parts together. In this case, the container must be firmly held, there must be no cracks. One way to join the shell parts is with a glue gun and hot melt glue.
Step 4
Take a sculpted non-hardening clay and lay it evenly down to half the depth of the container. It is not recommended to use children's plasticine, as it will be difficult to clean the model from it. Make the surface of the plasticine smooth, try not to form cracks when laying it.
Step 5
Place the model in the plasticine. Using a stick or a regular pencil, poke holes in the clay. They will function as locks so that the two parts of the mold do not shift during the manufacture of the casting.
Step 6
Measure the volume of the required shaping material. Such a volume can be calculated by the size of the container used, or you can use bulk material, which will need to be poured first into the mold, and then into some measuring container.
Step 7
Lubricate the surface of the model with a release agent. Do not use a silicone lubricant, but, for example, a wax, grease or soap solution.
Step 8
Stir the components of the molding compound in the ratio given in the instructions. Now fill the mass with a thin stream along the contour of the shell, making sure that no air bubbles form. After the top of the mold has cured, remove the clay completely. Be very careful not to damage the surface.
Step 9
Lubricate the model and mold (including locks) again. Prepare a two-component molding material and wait until the mold is fully cured. Now split the shape and extract the model. Your form is ready to use. To make the casting, it remains to tightly connect the parts of the mold and pour the casting material of your choice, for example, polymer resin or gypsum, into it.


