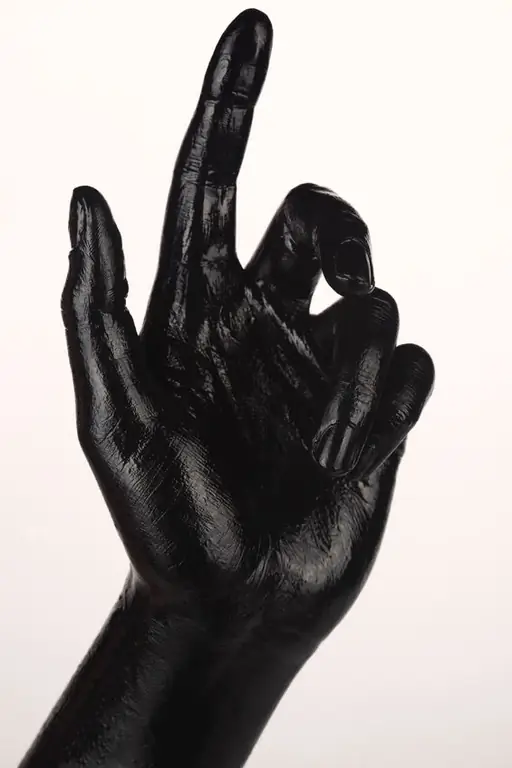
At first glance, hands are a minor detail in any portrait. However, incorrectly drawn, they will negate the impression of even the most beautiful face in the picture. If you pay enough attention to the drawing of the hands, they can become no less expressive than a look or a smile.

Instructions
Step 1
Place the sheet of paper vertically. With a thin outline, mark on it the space that will be allotted for the drawing.
Step 2
Calculate the proportions of the brush and represent them in a sketchy sketch. For more convenient work with proportions, select a brush fragment, which will become a kind of unit of measurement. In this case, the length of the index finger from the tip to the junction with the palm is best.
Step 3
The distance from the top of the thumb to the joint at its base will be slightly less. Pay attention to the location of these fingers. In relation to the vertical axis, the index finger is tilted to the right by about ten degrees. The thumb is strictly vertical.
Step 4
The width of the palm, excluding the thumb, will be equal to the selected unit of measurement. Draw a slightly smaller section of the hand from the point between the thumb and forefinger to the wrist.
Step 5
Divide both extended fingers into phalanges. For a large one, the bottom will be slightly longer than the top. In the index, on the contrary, the uppermost phalanx is slightly larger than the two lower ones (they are equal to each other).
Step 6
The length of the hand section from the base of the thumb to the wrist is equal to the sum of the lengths of the two lower “segments” of the index finger.
Step 7
Draw the bent parts of the brush. Notice that the finger-palm line deviates downward from the horizontal axis by about 30 degrees. The bend of the middle finger is at the level of the lower joint of the index. And the end of the ring finger coincides with the fold of the ring finger.
Step 8
Draw your nails. They occupy about half the length of the phalanx, but due to the spatial contraction on the middle and anonymous, they will appear longer.
Step 9
Having outlined all the subtleties of the shape of the brush, start painting it. In this photo, highlights, penumbra and shadows are very clearly visible. Do not paint over the areas where you see white highlights. Next to them are areas that need to be shaded with very thin light lines.
Step 10
Then go to the darker areas - select a 2M pencil for shading them and increase the pressure on it. Lastly, paint over the darkest areas of the hand in the center of the palm and between the fingers.


