A hat with a pompom is a popular headdress not only for children, but also for girls, young women and even men. You can knit a unique hat yourself. How to make a pom-pom for her? There are several ways to make it from yarn and fur.
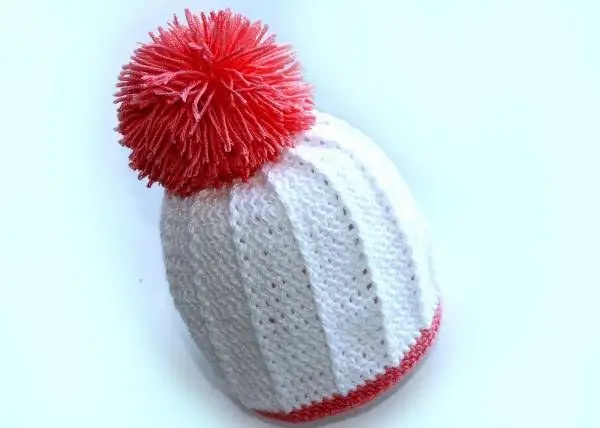
It is necessary
- cardboard;
- simple pencil;
- compasses or round dishes;
- scissors;
- fork;
- stationery knife;
- fur;
- yarn;
- braid.
Instructions
Step 1
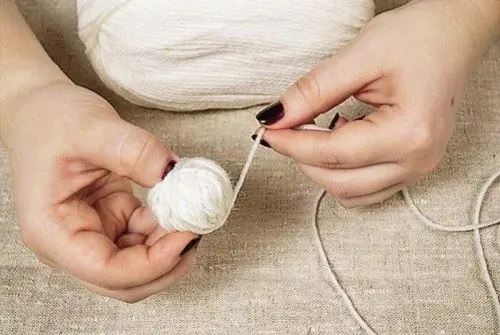
It's easy to learn how to make pom poms with your own hands. First, decide what size they will be in diameter and what material they are made of: yarn, artificial or natural fur, whether they will be of the same color or several, and also consider additional decorations for them. Also decide how thick the yarn will be used to decorate the headdress, because pom-poms with thin threads seem more fluffy, like fur. With thick ones, they also look very original. There are several options for making pompons with your own hands.
Step 2
The first method - pom-poms from threads according to patterns
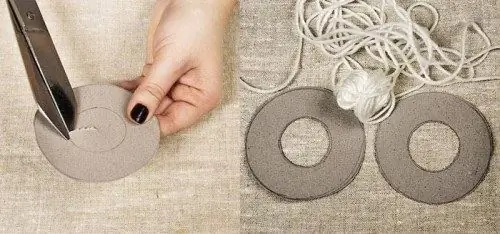
You will need two cardboard circles with through holes in the middle, like a donut. To make such, take cardboard, draw a circle on it using a compass or round dish. Its radius will be approximately equal to the diameter of the desired pompom. Now draw in this circle a circle half the size, which will serve as a hole for the ball to pass. Cut out this circle. Then attach to the cardboard, outline a second circle of the same size and cut out.
Step 3
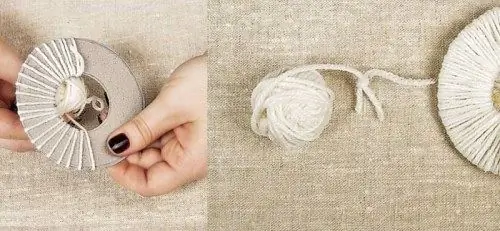
Unwind a ball of yarn according to the width of the hole in the cardboard circles. Now fold both circles together. On the margins of the cardboard, begin to carefully wind the threads as follows: a ball of thread with methodical constancy dives into the hole and makes a turn after turn around the edge of the circle. Try to wind the yarn evenly, thread to thread, so that the pompom looks aesthetically pleasing in the end. And in order for it to be thick, make several rows using new balls. There are other colors that correspond to the main colors present in the headdress. Then the ball on the cap will be multi-colored.
Step 4
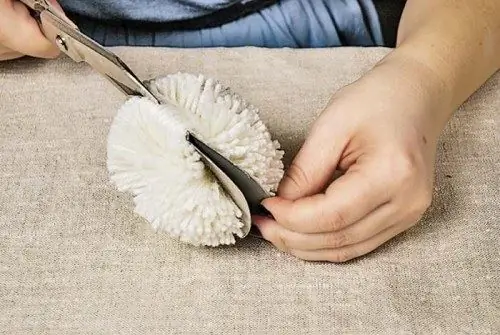
When all the threads are wound on cardboard blanks, take scissors with sharp ends and cut the threads along the outer edge of the circles where the circles close. At the same time, keep the product on the table, gently holding the yarn fibers with your other hand so that they do not crumble. Now cut off the long thread that will pull the yarn into a pompom.
Step 5
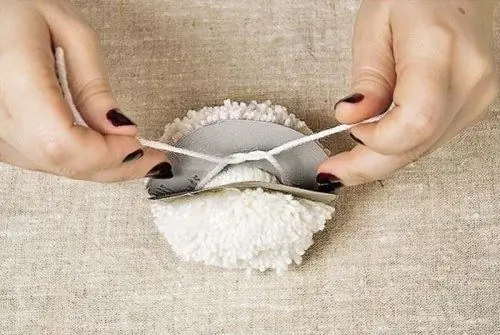
Next, slip this thread inside the two patterns and slowly pull all the threads into a bunch, making sure that it turns out exactly in the middle. That is, all the pom-pom villi should be evenly distributed across the width. Remove the cartons. For a strong interception, make a few circular turns and tie tightly. Then thread one end of the thread into the large-eye needle and sew several times in the middle. Cut the threads that stick out evenly and sew the pompom to the hat with the same needle and thread.
Step 6
The second method is winding the thread on the arm
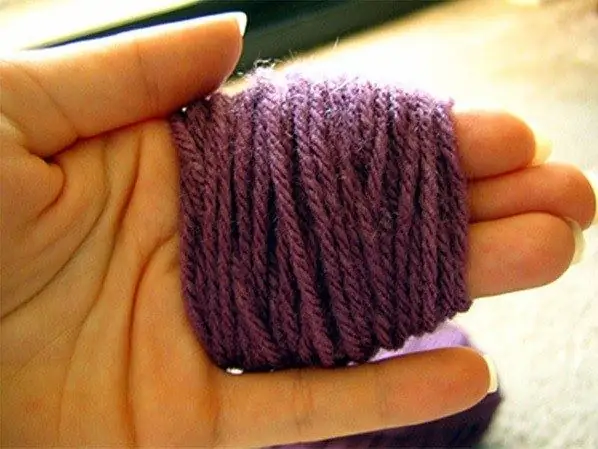
Pinch the end of the thread and start winding the ball around your fingers. You can fold two, three, or more fingers together, depending on the size of the intended pompom. Carefully remove and twist several times with the end of the thread across the resulting skein. Tie in a knot and cut the loops of the thread with sharp scissors. Spread out, your pompom is ready.
Step 7
The third way is to wind the thread on a fork.
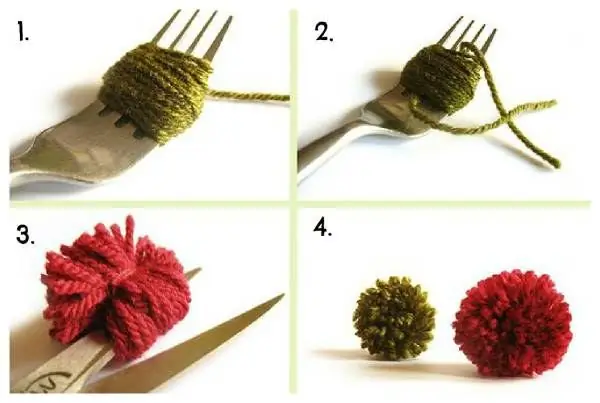
Use a regular table fork to make small pom poms. Take a fine yarn and wind as many turns as you like around the fork tines. Then pull the thread in the middle and tie it in a strong knot. Remove the pom-pom from the fork and cut the loops of the thread.
Step 8
The fourth method is a pom-pom from a finished skein of yarn
In this version, the task is simplified, there is no need to wind threads, ready-made yarn is used, preferably thick. Such pom-poms are voluminous, fluffy. Cut a piece of thread 20-25 cm long, wrap the yarn across with two or three turns, tighten and tie in a knot. Using scissors with sharp ends, cut the resulting loops on one side of the skein. Then repeat on the other side. Do this slowly, straightening the threads to cut all the loops. Then shake the pom-pom to fluff and trim the threads.
Step 9
Fifth method - fur pompom
Place a piece of natural or faux fur on a hard surface with the fibers down. Take a clerical knife and cut a circle with it without touching the fur. The diameter depends on the desired size of the finished pompom. Never use scissors and a regular knife, you will cut off the villi and the pompom will not be fluffy and beautiful. Next, sew large stitches around the edge with strong thread. Take any filler, preferably one that is softer, for example, foam rubber or cotton wool. Tape around the filler and place over the fur circle. Pull the thread that was stitched around the edge so that the foam is on the inside and the ends of the tape are on the outside. Tie with a strong knot. The result is a beautiful fur pom-pom with a braid that can be used to tie it to a hat.


