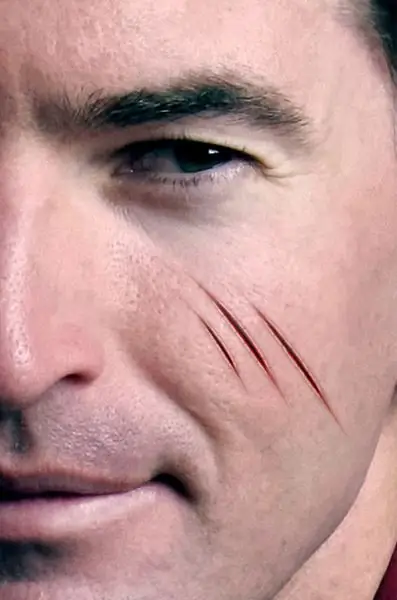
Photoshop opens up new horizons for you not only in retouching and color processing of photos, but also in creating various effects and neoplasms in images - in particular, realistic body modifications. If you have always dreamed of seeing how a tattoo or piercing would look on you, Photoshop will help you, as if you decide to complement your appearance in a photo with a realistic scar.

Instructions
Step 1
Load the photo in Photoshop and create a new layer (Create new layer). Zoom in on the photo, zooming in on the place where you want to place the scar, and then on the toolbar, click on the Pen Tool icon and draw a curved line of the desired length with black color.
Step 2
Now change the tool to the Eraser Tool, select a thin soft brush and smooth the edges of the line, making them slightly blurred, and make its two ends thinner and null - so that the line resembles the shape of a natural scar.
Step 3
After that, select a dark red color on the palette, set the Mode Color and Opacity to 100%, and then click on the scar layer, holding down the Ctrl key to select it and paint over the scar with the selected color.
Step 4
If necessary, lighten the scar with the Dodge Tool. Double click on the scar layer to open the layer style editing window and select the Outer Glow tab. Adjust the gradient fill from dark red to transparent and set its opacity to 50%. Click OK. The scar will become more voluminous.
Step 5
Use the Brush tool to make the scar more realistic and paint small dark red cracks around it, setting the brush size to 1 pixel and the Color Burn brush mode to 10% opacity. If necessary, copy the scar layer to create new similar scars on other parts of the body in the photo.


