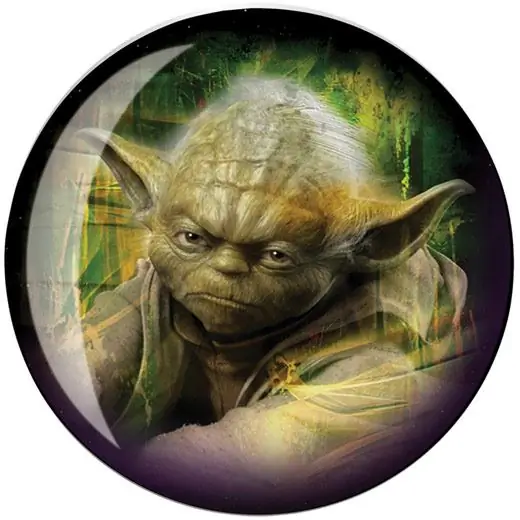
Unlike simple needlewomen, virtual hand-made masters only need a computer and Adobe Photoshop installed on it. Thanks to this article, you will learn how not only to create a ball, but also to insert a photo into it.

It is necessary
Russified version of Adobe Photoshop CS5
Instructions
Step 1
Launch Adobe Photoshop and create a new file by pressing Ctrl + N hotkeys. Specify 200 pixels for Width and Height, click OK.
Step 2
Fill the document with black by pressing Alt + Backspace. Click the menu item "Filter"> "Rendering"> "Flare" and set the following settings: "Brightness" - 100%, "Lens type" - 105 mm. Choose Filter> Distort> Polar Coordinates> Polar To Rectangular> OK. Then click Image> Image Rotation> 180 Degrees> OK. Now click Filter> Distort> Polar Coordinates again, but now set the Rectangular to Polar option and click OK. As a result, you should get an imitation of a flare on a spherical object.
Step 3
Select the Elliptical Selection tool (hotkey "M", toggle between adjacent tools "Shift" + "M"), hold down "Shift" and create a selection around the sphere. Right-click on the selection and click "Invert Selection" or use the hotkeys "Ctrl" + "Shift" + "I". Press Alt + Backspace - the area around the sphere will turn black. Press Ctrl + Shift + I to remove inversion.
Step 4
Click the key combination "Ctrl" + "Shift" + "N" to create a new layer. Double click on the name of the new layer (by default "Layer 1") and name it "Black". Press D to make black the foreground color and then Alt + Backspace. Hold "Shift", click the buttons to the right and up, release "Shift". Click "Delete" and then, while holding down "Shift" again, click the down and left arrows. Create another layer, name it "White". Press X to make white the foreground color, then Alt + Backspace. Click "D" again, hold down the Shift key and click the down and left arrows. Release Shift and press Delete. Hold down "Shift" again and press the up and right arrows. As a result, it should turn out so that the lower left side of the ball will have the shape of black, and the upper right side will have a white crescent.
Step 5
Right-click the White layer, then Blending Options> Blending Mode> Overlay. Click the menu item "Filter"> "Blur"> "Gaussian Blur" and set the Radius to 4. Activate the "Black" layer, go back to "Filter" and select the very first value, "Gaussian Blur" - the last filter, which you used before. The Opacity field is in the upper right corner of the Layers window, set it to 75%. This will make the sphere look more realistic.
Step 6
Create a new layer and place it on top of the existing ones. Click on the emblem of the primary color (located on the toolbar) in the very bottom field, enter "FFFFCC", click "OK". To paint the layer with the selected color, press Alt + Backspace. Similar to the fifth step of the instruction, open the menu of blending modes of the newly created layer and specify the "Color" parameter there.
Step 7
Choose Layers> Layer Style> Outer Glow. Set the Blending Mode to Lighter, Swipe to 10%, Size to 51 pixels, and leave the rest of the settings unchanged. Click Layers> Layer Style> Inner Glow. Specify there "Blending Mode" - "Lighter", "Size" - 29 pixels, the rest of the parameters are unchanged. The result should be a glowing ball.
Step 8
Open the picture you want to place in the ball: "Ctrl" + "O", select the file and click "Open". Click Image> Image Size and enter values up to 130 for Width and Height, and then click OK. Activate the Move tool (hotkey "V") and drag the new image onto the document with the sphere. Using the same tool, align the picture to the center of the sphere. Select "Elliptical Selection" and select the place in the new picture, which will be accentuated. Press the key combination "Shift" + "F6" and set the feather radius to 20. Click "Ctrl" + "Shift" + "I" and then press the "Delete" button to blur the edges of the picture. If the corners of the picture are still visible, press Delete enough times to hide them.
Step 9
To save the result, press the "Ctrl" + "Shift" + "S" keys, specify the file name, select the path, in the "Files of type" field, set "Jpeg" and click the "Save" button.


