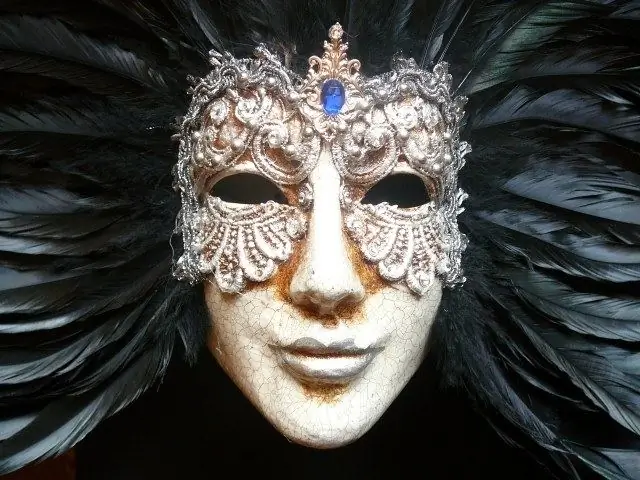
The image of the carnival mask differs significantly from the usual portrait - and not only in the presence of decorative details. Unlike a human face, an artificial face is symmetrical, and its proportions are distorted. Therefore, if you decide to draw a mask, sketch from life or use the sample in the photo.

Instructions
Step 1
Place the paper vertically. Use an oval shape to outline the "face" of the mask. Divide it in half lengthwise to get a vertical axis. With respect to it, check how symmetrically the parts of the picture are located.
Step 2
Draw horizontal lines for the parts of the face. In this case, the distance from the forehead to the line on which the eyes will be is equal to the distance from the axis of the eyes to the axis of the lips. The gap from the lips to the chin should be half the size.
Step 3
Determine the width of all parts of the mask. Thus, the width of the bridge of the nose is half that of the width of the nose at the level of its wings. From one corner of the lips to the other, set aside one and a half times more centimeters than from one edge of the nose to the other in its widest part. And from the upper to the lower lip, the distance is 2 times greater than the width of the bridge of the nose. Having defined the boundaries, draw the shape of the lips.
Step 4
Calculate the size of the eye holes on the carnival mask. Their length is equal to the length of the lips, and the distance from the upper eyelid to the lower one is 2 times less than this value. Make the upper eyelid more convex than the lower. Draw the outer corners of the eyes higher than the inner ones.
Step 5
Use light strokes to outline the shape of the feathers that frame the mask. This is necessary in order to fix their size and location. Then carefully copy the pattern that fills the top of the mask. After that, it will be possible to color it.
Step 6
First, apply the basic tone of the "face" - white with the addition of gray and bluish. Add shadows to the cheeks, the lower part and wings of the nose, the upper lip and the outline of the lower lip. On the right, they are gray-lilac, and on the left, yellowish.
Step 7
With a thin brush, carefully paint all the elements of the pattern on the mask, indicating the light and shade in each area. It is also painstaking to color each feather, indicating highlights and shaded areas. To convey the texture of the feathers, you can first fill them with watercolors, and when the paint dries, draw individual lines with a watercolor pencil, gel pen or liner.


