Sometimes you just need to improve the photo, remove skin blemishes from age spots, pimples, wrinkles, or correct facial features and figure.
Instructions
Step 1
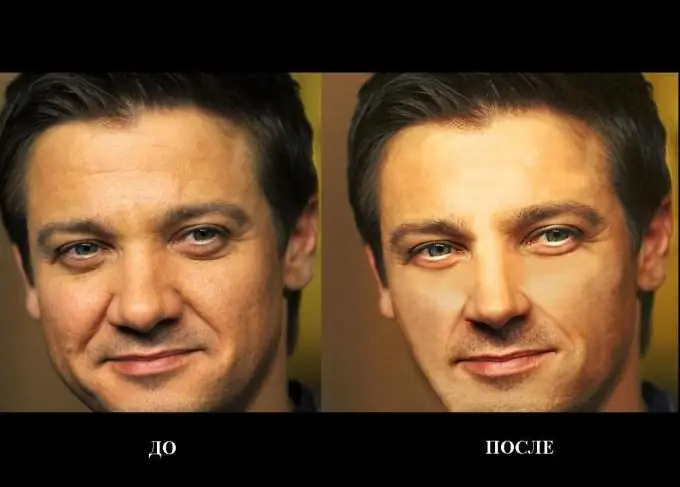
Let's take a photo of a man and adjust it in the Gimp 2.8 program. Appearance is usual, but you need to make a handsome man. With age, the oval of the face sags, wrinkles appear, the nose grows, moles and warts appear. Basically, in the photo "After" - how this man might look after plastic surgery on the nose, circular facelift and laser skin resurfacing. So it could be the same person.
Step 2
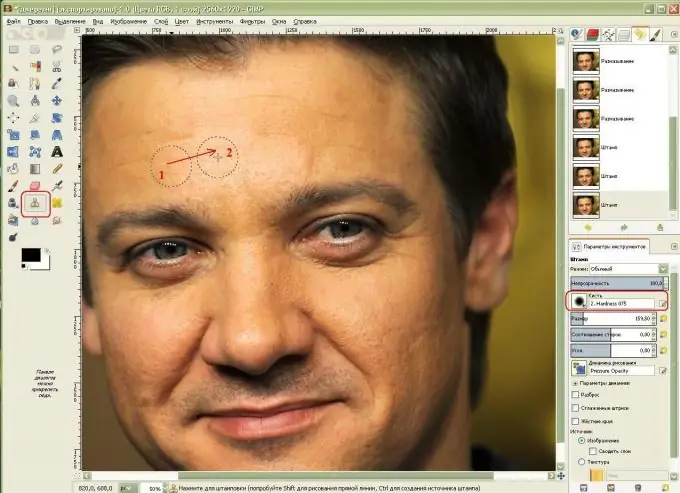
The first step is to remove wrinkles. To do this, select the Clone Stamp tool, find an area of skin without wrinkles, copy it by clicking it while holding down the Ctrl key, and click on an area of skin with wrinkles. Now this brush will repeat this area and clone. I chose the largest brush with soft edges, hardness 0.75 for a smooth transition between areas of the skin.
Step 3
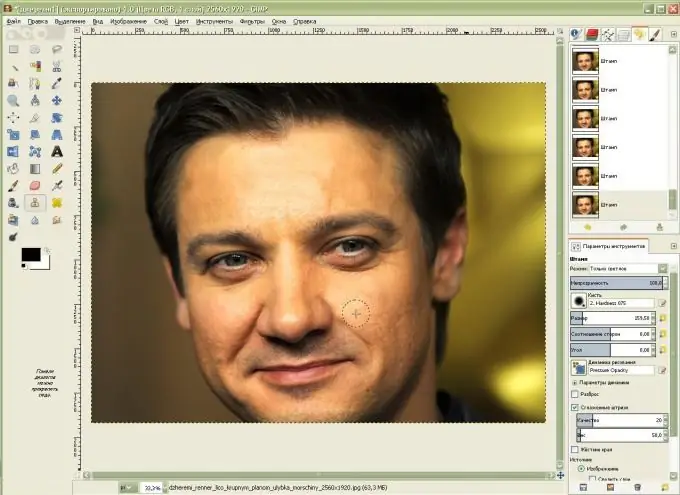
Next, let's go over the cheeks - we will also hide the most porous skin areas.
Step 4
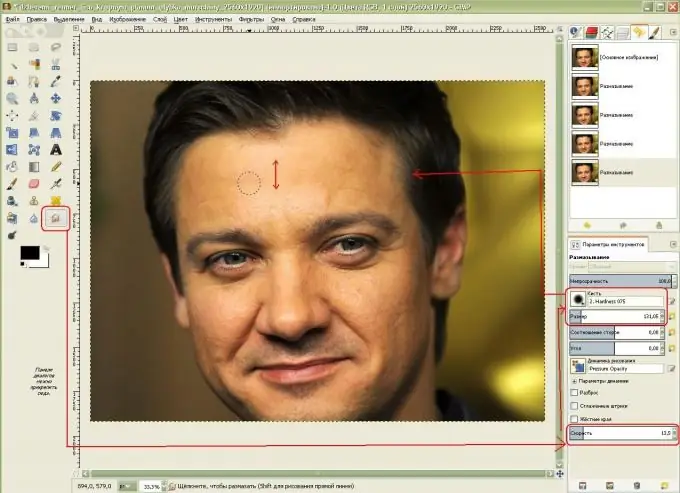
We continue to remove skin imperfections: wrinkles and too porous skin. To do this, take the Smudge tool in the form of a hand with a finger. In the parameters of the tool, select the "Brush" with blurred edges (for me it is Hardness 0, 75), set a not very high speed of the stroke (for me it is 13, 5). I increased the brush size a little and began to smear the wrinkles on my forehead in a circular up and down motion.
Let's walk in a circular motion with a brush along the cheeks and smooth along the nose, eyelids and natural nasolabial folds and moles on the right cheek - so that the photo looks believable.
Step 5
The man acquired smoother skin, the birthmark was removed with a stamp and the nasolabial folds were reduced. Now our man is about to face serious changes in the oval of his face! In the drop-down menu, select Filters-Distortion-Interactive Distortion.
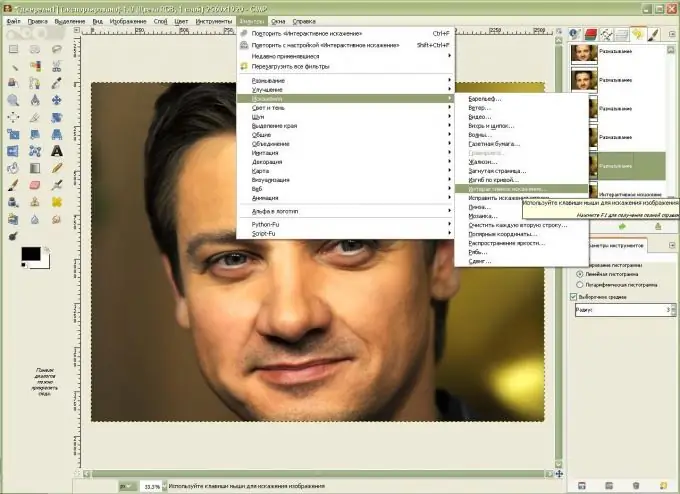
Step 6
To work with a larger face image, you need to select it.
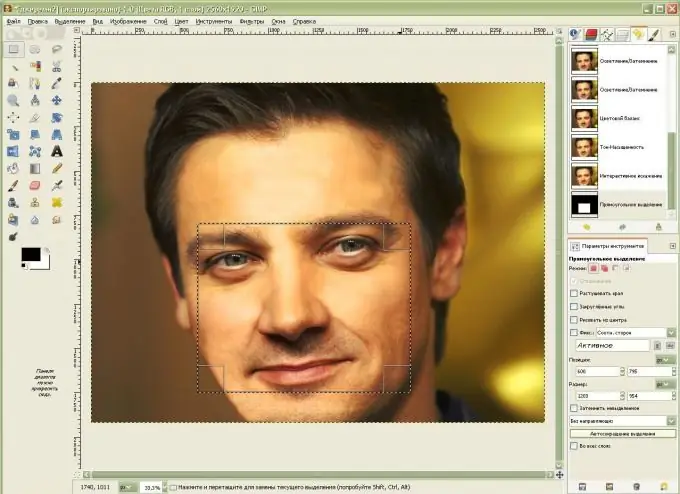
Step 7
Now, using the "Move" function in the "Deformation modes" we will change the oval of the face - we will give it a more toned look, using the "Shrink" function, clicking on the part of the nose and holding, we will reduce the nose, then using the "Move" we will move it to avoid skewing … It is important, when shaping the oval of the face, to choose a larger deformation radius, and when moving the nose and nasolabial folds, a smaller one. Using the "Grow" function, click once on the eyes to enlarge them a little. If we do not like the results obtained, by selecting the "Delete" function, we drive over the desired area, removing the made transformations.
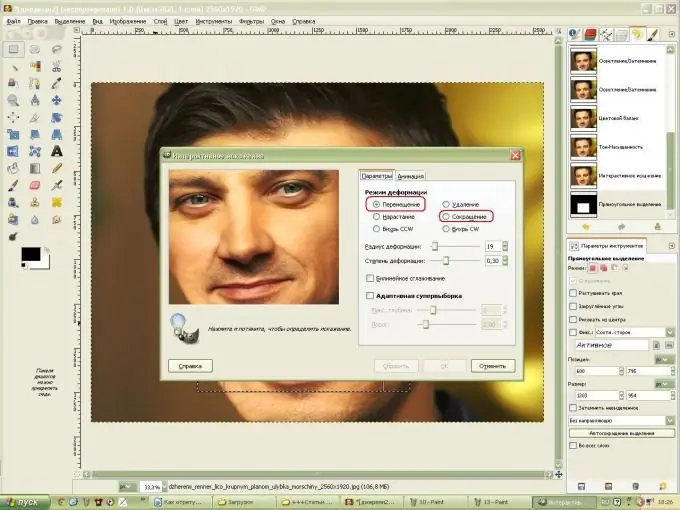
Step 8
To give the oval of the face on the left side a more natural look, draw on the edge of the face with the "Dodge-Burn" brush, hold down the Ctrl key, and darken the cheekbones. Lighten the eyes with the same tool. Next, apply the "Not Sharp Mask" filter to sharpen the face.
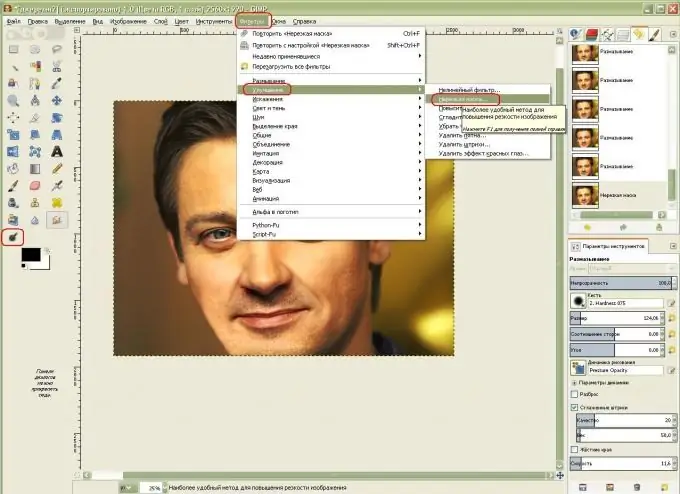
Step 9
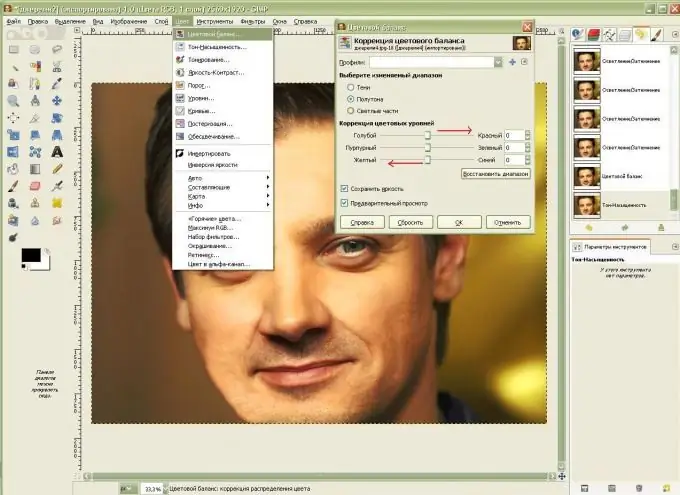
Now let's change the color of the face: choose "Color-Color Balance" from the menu, increase the value of the red and yellow colors by dragging the sliders.
Step 10
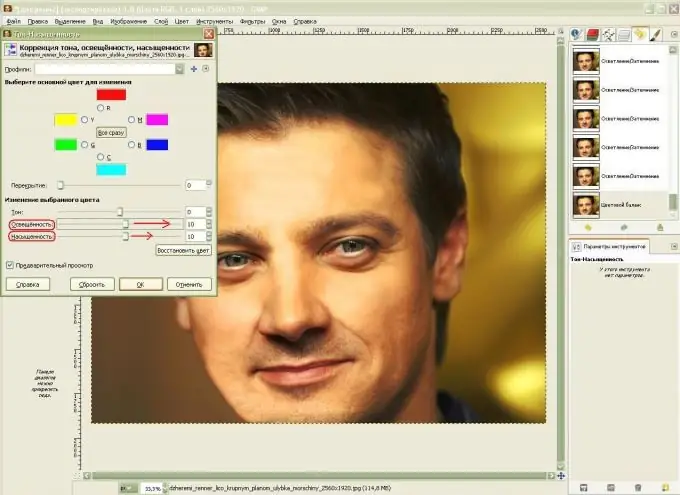
Now you need to lighten the face to hide the too smooth skin and make the complexion more saturated. Select "Hue" and "Saturation" from the menu, increase the lightness and saturation a little.
Step 11
I did some more work on the eyelids and nose, improving them with the Interactive Distortion filter.


