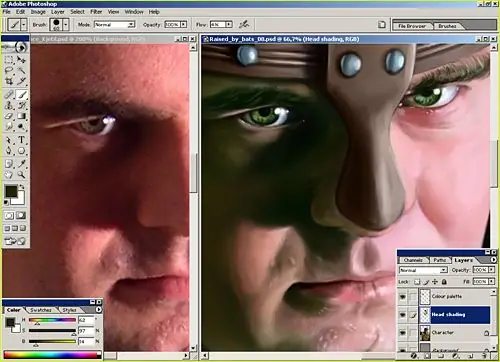
The fantasy genre is very popular today, both in cinema and literature, and in painting. It is not surprising that many artists and computer graphics are interested in fantasy themes and embody it on their canvases. If you also dream of learning how to draw fantasy, you can try your hand at Photoshop - this graphic editor, if you have a tablet, allows you to create beautiful and realistic illustrations.

Instructions
Step 1
Come up with a genre and theme for your future painting. Make a sketch - choose the pose of the main character or the hero of the picture, determine from where the light will fall on the hero. Also determine what the main colors of the picture will be, and what the overall color scheme will be.
Step 2
You can make a sketch of the future picture right in Photoshop using a small hard brush. Sketch the silhouette of the character in your painting, transfer the main reliefs of the body, and then create a new layer and fill the drawn shape with the main color chosen for the skin. Reduce the opacity of the sketch lines layer.
Step 3
Select the desired colors on the palette and apply them in the picture using brushes of different softness and opacity. Aim for the effect of a three-dimensional image, shade some places on the character's body, and lighten some with highlights.
Step 4
Depending on the overall color scheme of the painting, you can choose any color to display the highlights - it doesn't have to be white. A drawing with bluish or pink highlights will look original and fantasy. A good color for shadow fragments is dark purple.
Step 5
Having worked out the basic tones of the hero's body, proceed to its detailing. Draw parts of the body, making them clearer and more distinct, add facial features and outlines of the hairstyle. Use a thin, almost transparent, brush and refine the small details of the face and body of the character with it. Pay special attention to drawing the arms and legs - they should be proportional, realistic and anatomically correct.
Step 6
In any part of the body, you can add an element that enhances the fantastic feel of the painting - for example, you can customize the hair of the character by depicting it in the form of flames, lines of light or the tentacles of a jellyfish. Using the Smudge Tool or the Blur Tool, slightly blur the lines with which you drew the hair - this will make the drawing look more mysterious.
Step 7
If you have a good texture of leather or other surface suitable for a given painting, you can apply it to your character.
Step 8
If necessary, correct the colors of the picture in the Color Balance section, slightly changing the tonality and saturation of certain shades.
Step 9
For the most interesting look for your character, process the drawing with a Noise filter, and then a Gaussian Blur with a small blur radius. And finally, work on the background of the drawing - it can be invisible and abstract, if the character is playing the main role in the drawing, or it can be bright and plot.


