There is something incredibly attractive about plasticine cartoons. Right in front of the amazed spectators' eyes, a multi-colored lump of plasticine turns into whatever the author wants. This spectacle is so fascinating, there is an irresistible desire to do this hocus-pocus yourself.

It is necessary
Plasticine, camera, tripod, table, glass, two or three table lamps, computer, Premier and Final Cut Pro programs, microphone
Instructions
Step 1
So where do you start? Any director will say that a film starts with a story. Since we have decided that our cinema will be plasticine, it would be good to find such a story so that the plasticine would have a place to roam, i.e. so that a piece of plasticine turns into one thing and then another many times. Let your imagination run wild and create your own story!
Step 2
The creator of the plasticine cartoon is likened to the Creator who creates the world. And the structure of the world of the future cartoon, its beauty and strength depends on what material you take. Try to pick up a plasticine that does not stick to your hands, otherwise it will be difficult for you to work with it. It is desirable that the palette of colors is varied and rich, so that you can mix colors like paints. And one more condition: there should be a lot of plasticine so that you do not have to be distracted from work and run to the store at the most inspired moment.
Step 3
To make it convenient for you to work, make a so-called cartoon machine. An ordinary table is suitable for its basis. Mount the camera above the table on a tripod with the lens pointing down. Place the glass above the surface of the table - this will be your working surface on which the plasticine will move. Under the glass, you can change the backgrounds of your decorations. Install lamps for lighting on the right and left. This is the simplest construction of a cartoon machine. In the process, you can improve it.
Step 4
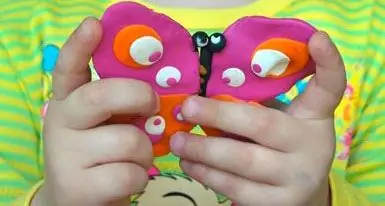
You can create from a simple lump of plasticine, transforming it into whatever you want. For example, you need to film a butterfly hatching from a cocoon. Blind a multi-colored butterfly with spread wings, slide it under the camera and click the frame. Then fold her wings, frame by frame filming your actions. And gradually wrinkle and crush the plasticine into one lump. Scroll back the footage and you will see how a butterfly is hatching from a cocoon. Such transformations are the most fascinating in plasticine cartoons.
In our cartoon, plasticine dolls can also be removed, inside of which there is a wire frame, similar to our skeleton. This is necessary so that the doll can stand firmly on its feet, walk, sit, move its arms and head. But for working with such a doll, our cartoon machine is no longer suitable, it must be filmed on a model in three-dimensional decorations, not flat ones. If you don't want a voluminous doll, you can mold a flat one, without a wire inside, put it on the glass of our cartoon machine and shoot with a camera suspended from above.
Step 5
Transfer the footage to your computer and edit in Premier or FInal Cut Pro, you can try others. Add sound, noise or music. You can also record your own voice from the author. Try and experiment!


