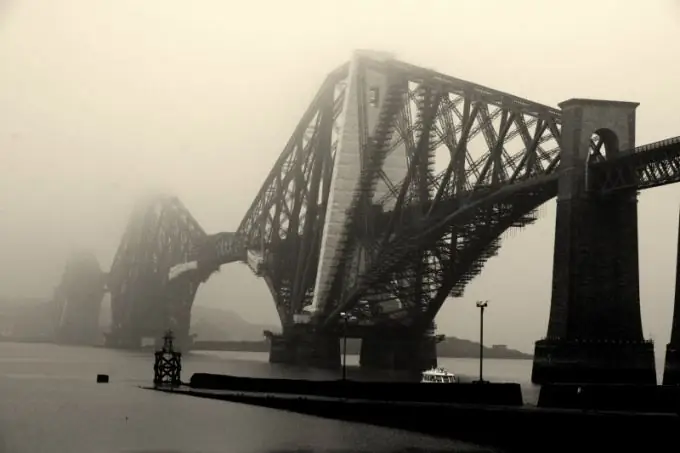
Fog is a natural phenomenon full of mystery. This is a very attractive state of nature for creating photographic landscapes. Coping with shooting in these conditions is not difficult at all.

Instructions
Step 1
It is necessary to understand that fog is a natural phenomenon due to the accumulation of large amounts of water in the air. The fog itself is air that has become not entirely transparent. It is not interesting to shoot only these suspensions, you get just a gray homogeneous substance that fills the entire photo. The only way to get an interesting shot is by juxtaposing or comparing with other subjects. It is necessary to show how the fog affects the species we are used to.
Step 2
In Russia, fog can be found in the evening or early morning, for daytime this phenomenon is less typical. The easiest way to find him is to leave the city early in the morning to arrive before dawn to a lake, river or low-lying field.
Step 3
The most vivid photography will be landscapes, including cityscapes. It should be noted that fog is a powerful tool for achieving tonal perspective, which appears to brighten and blur objects as they move away. This effect creates the deepest space in photography. Compose your shot in such a way as to compose any large dark foreground object with the background. When doing this, focus preferably on the foreground. For example, it can be lampposts and people against the background of a bridge stretching into the misty distance, or a large old tree standing in an open space. In the fields, you can take a high shooting point and find a position where both the fog creeping on the bank of a river or pond and the space free from it enter the frame.
Step 4
A good palette of colors and midtones will add special charm to the picture. To do this, you need to choose the right exposure. Use the lowest ISO setting for your camera. The lower the value of this parameter, the more halftones you will get in the photo. The fog will create depth of space and some kind of blur without a wide open aperture, so you can safely close it to values of 5, 6 - 9, which will increase the sharpness of objects that fall into the focus area. All these manipulations will make the shutter speed long, and therefore you will have to put the camera on a tripod.
Step 5
Be sure to shoot in RAW. In the editor, along with other parameters, you can change the color temperature of the image, as well as increase or decrease the overall contrast or contour sharpness, which will greatly affect the appearance of a foggy morning.


