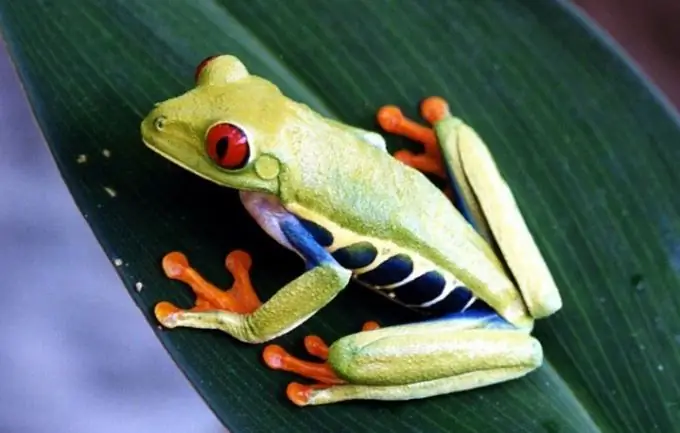
Tired of drawing still lifes? Tired of painting portraits and can't look at landscapes? Take a break from serious artistic themes in the exotic - for example, draw a frog.

It is necessary
Watercolor paper, pencil, eraser, watercolor, brush, 2 water containers, palette
Instructions
Step 1
Place the sheet of paper horizontally. Divide it in half with vertical and horizontal lines. Mark the approximate location of the frog. Its main mass is shifted slightly to the left. The center of intersection of the axes falls on the center of the back of our object.
Step 2
Draw the center axis of the object. Those. imagine that you are drawing her spine. This line is positioned at a 45 degree angle to the previously drawn vertical line. The line of the left foreleg is at an angle of 85 degrees in relation to the spine, and the hind limb is at an angle of 45 degrees.
Step 3
Now it is necessary to determine the proportions of the body of our heroine. For this we use the sighting method. Take the length of the frog's head as a measure. It fits in the length of the body exactly twice. Lay these lines on the axis. The hind legs (together with the toes) fit about 1, 8 of this distance. In the front paw (without the hand) - 1, and in the hand itself - 0.5 times the length of the head.
Step 4
Imagine all parts of the object in the form of simple geometric shapes. It is in this schematic form that you transfer them to the drawing. The head is a pyramid with rounded corners. The eyes are balls, the torso is a cone, and the legs are cylinders. Then sketch out all the shapes more precisely, in accordance with the real outlines of the frog.
Step 5
With a pencil, lightly, without strong pressure, mark in the figure the spots of the spotted color on the abdomen and paws. This will help you avoid confusion when you need to quickly work with watercolors. Also outline the shape of the leaf on which the frog sits.
Step 6
Prepare two containers of water: in one you will wash the brush, the second should remain clean.
Step 7
Define the main color spots in the foreground. Apply them (a little lighter than necessary) with a wide squirrel fur brush: on the crown, back and upper surface of the hind legs - a mixture of grass and ocher, on the side of the muzzle and back - cold blue-green, on the front leg - a mixture of grass, ocher and sepia tone. Wash the brush in clean water, squeeze lightly and wash on the sheet where the frog's skin shines - in the area of the junction of the head and body, the lower back and the upper part of the left hind paw.
Step 8
Now shape the volume of the object. To do this, you need to more accurately disassemble it in shades, carefully work out the places where colors and your own shadows change. Keep in mind that the highlights of the subject have a warm hue, while those in the shade are cold.
Step 9
When the object is complete, fill the background with color. Here, accurate drawing is not required and even contraindicated.
Step 10
Mix on the palette the same shades that you used for the very first layer of color on the frog, only darker. Apply them gently to the surface using a dry foam sponge (try this method on a draft first). This will convey the roughness of the skin.
Step 11
Move 3-4 steps away from the drawing, or even better - turn it upside down - in this position you can see the flaws that you did not notice from a close distance, and bring the drawing to perfection.


