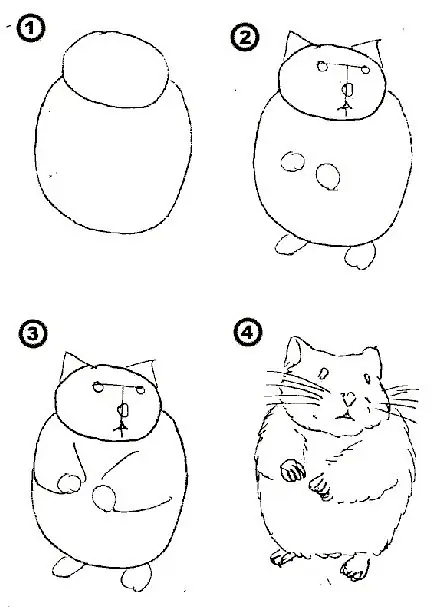
Hamsters are cute little animals. The color of the hamster can be different: black, gray, brown, white, yellow, or mixed. Drawing a hamster is, in principle, easy. This can be done in four steps. Let's try to go through them.

It is necessary
For this drawing, you will need a sheet of paper, pencils, an eraser, and, if available, a ready-made image of a hamster, which you can refer to as you draw. If you do not have such an image, you can use the illustration that illustrates this article
Instructions
Step 1
Draw a basic shape - any drawing always starts with it. In this case, the basic shape is needed in order to designate for yourself the size of the hamster and its contours.
First, draw a circle for the head, and make notes for the nose, eyes and mouth.
After that, under the first circle, draw a second - larger one. From this circle, the body of the hamster will be drawn in the future.
Step 2
Then, on the already drawn basic shape, begin to draw the details: paws and muzzle. Thus, two circles will appear in your drawing - eyes, and two triangular shapes - ears. Then sketch out the nose, the area around the eyes, and what looks like "sideburns" on the face. Sketch and draw the paws. Check the sample. Seem to be? Let's move on to the next step.
Step 3
This is the penultimate step in drawing a hamster. You need to look at your drawing, if you see that some details have not been drawn, draw. Then - start drawing the fur. The hamster's fur should be round and short. After your drawing is ready - erase unnecessary lines and details.
Step 4
The final step is coloring. If your sketch is similar to the suggested sample, you can color it in whichever colors you like best. Your drawing is ready.


