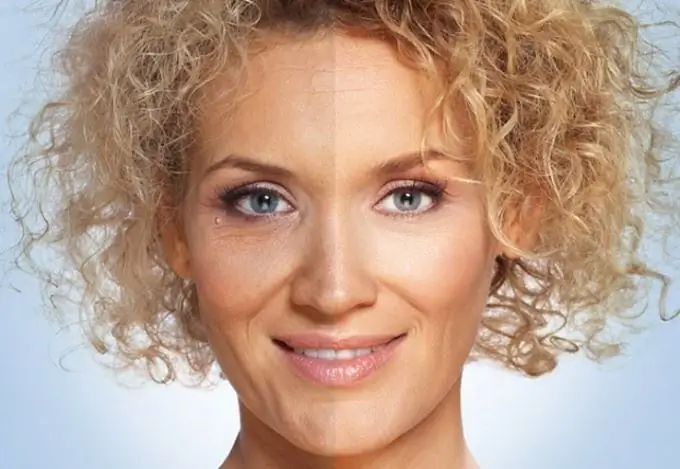
Many people, especially women, want to remove wrinkles from digital photographs. This can be done using the dedicated Adobe Photoshop program. Even the most ordinary PC user who does not have the skills in professional retouching can cope with such a task. There are several ways to remove wrinkles in the photo.

It is necessary
- - Adobe Photoshop;
- - digital photography.
Instructions
Step 1
The first way to remove wrinkles in a photo is to use the Healing Brush Tool. This technique allows you to eliminate wrinkles in the forehead and neck. So, open the desired photo in Photoshop: the File menu - the Open item.
Step 2
Then create a new photo layer by pressing the keyboard shortcut Ctrl + J. Using the Zoom Tool (located on the toolbar to the left of the work area), enlarge the problem area of the skin.
Step 3
In the same panel on the left, find and select the Healing Brush Tool (J key). On the property bar, which is located at the top of the window, select the desired thickness and hardness of the brush.
Step 4
Press the alt="Image" key and while holding it, left-click on the area of clean skin that is next to the wrinkle area. This site will become a cloning sample. Then, releasing Alt, gently paint over the wrinkles. To do this, drag over them while holding the left mouse button.
Step 5
You can also remove wrinkles in the photo using the Patch Tool. It is convenient to use such a tool to remove mimic wrinkles in the corners of the eyes and nasolabial folds. In the toolbar on the left, find the Healing Brush Tool and right-click on the icon. Select the Patch Tool from the drop-down list.
Step 6
Circle the problem skin area with wrinkles in the photo by holding down the left mouse button. Then move the cursor over the selection and, again holding down the left button, drag the selection onto the area of clean skin without wrinkles.
Step 7
If the processing result does not look too natural, do the following. In the Layers panel to the right of the Stage, find the Opacity parameter. Click on the triangular icon to the right of it and adjust the layer's opacity. To do this, move the slider until the treated area with wrinkles looks more natural.
Step 8
After the done actions, save the processed photo: menu "File" - item "Save As" (Save As …). Now you know how to remove wrinkles from a photo. Agree that this is not difficult at all. Experiment with the aforementioned tools and you will definitely succeed.


