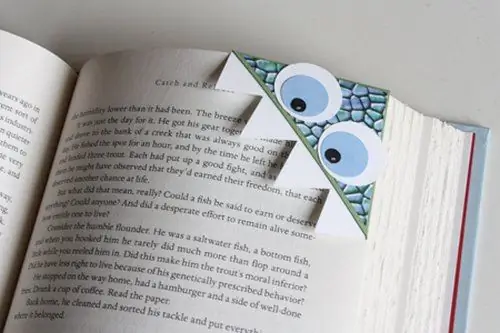
Bookmarks are very useful elements that help you find the right page in a book in a short period of time. You can make cute bookmarks with your children, especially since it does not take much time.
It is necessary
- - album sheet;
- - colored cardboard;
- - colored paper;
- - scissors;
- - pencil;
- - glue;
- - ruler.
Instructions
Step 1
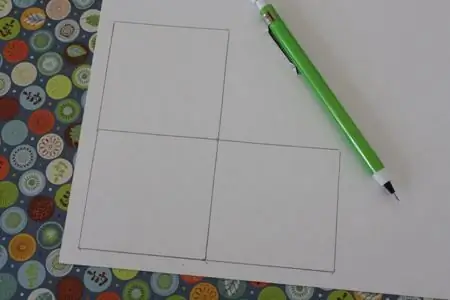
Take a scrapbook paper and draw a six-centimeter square on it. On the right side and on top, draw another square with the same sides. As a result, you should get three squares, arranged in the form of an angle.
Step 2
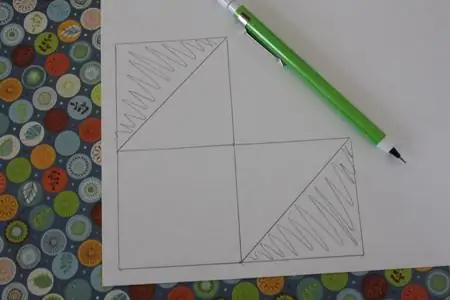
Take a ruler, draw diagonals at the two outermost squares (the diagonals should run parallel to the corner). Shade the outermost triangles.
Step 3
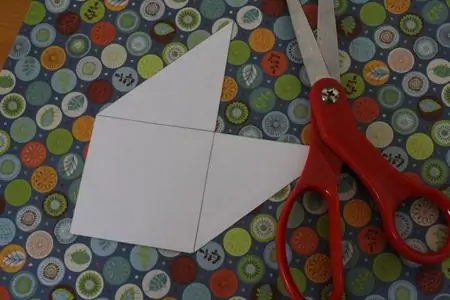
Using scissors, cut off the previously shaded triangles. As a result, you should get the figure that is shown in the picture. The template is ready.
Step 4
Take cardboard (its color can be any), put the made template on it, carefully circle the figure, then cut it.
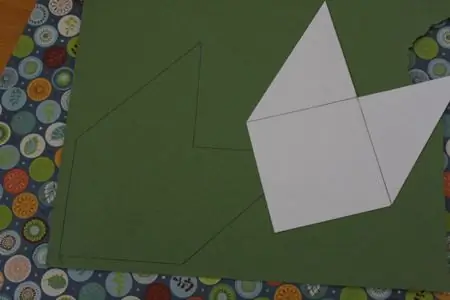
Step 5
Take a ruler and pencil and restore the square in the shape: to do this, put a ruler parallel to the two sides of the square and draw lines.
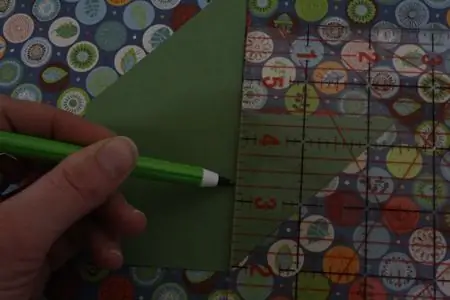
Step 6
Cut a square of a slightly smaller area out of colored paper than the square in the workpiece, its sides should be about 5, 7 cm.
Spread glue on the inside of the resulting square and carefully glue it to the square in the workpiece. Allow the glue to dry completely (this is required to avoid damaging the colored paper in the following steps).
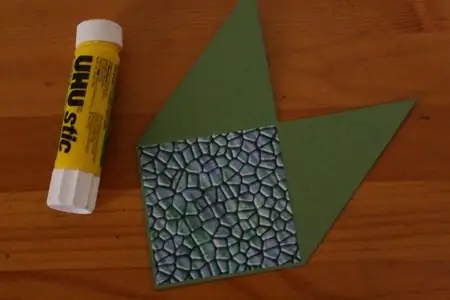
Step 7
Fold one triangle so that it covers half of the square. Do the same with the second triangle.
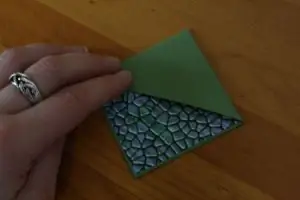
Step 8
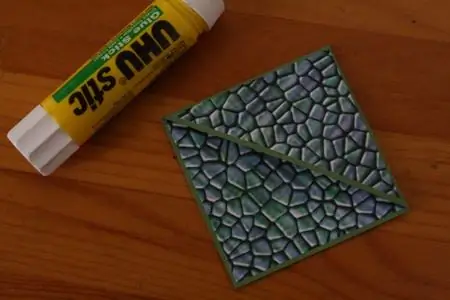
Cut a triangle out of colored paper that is slightly smaller than the one that turned out in the blank. Glue it down gently on top.
Step 9
The final stage is decor. From the album sheet, cut two circles with a diameter of two centimeters, from blue colored paper - two circles with a diameter of one centimeter, from black paper - two circles with a diameter of 0.5 centimeters.
Stick the blue ones on the white circles, and black on the blue ones. It turned out "eyes". Glue them neatly to the triangle on the bookmark.
From the album sheet, cut out the "teeth" in the form of a strip of isosceles triangles with sides of one centimeter and glue them to the cut of the triangle. The pocket bookmark is ready.


