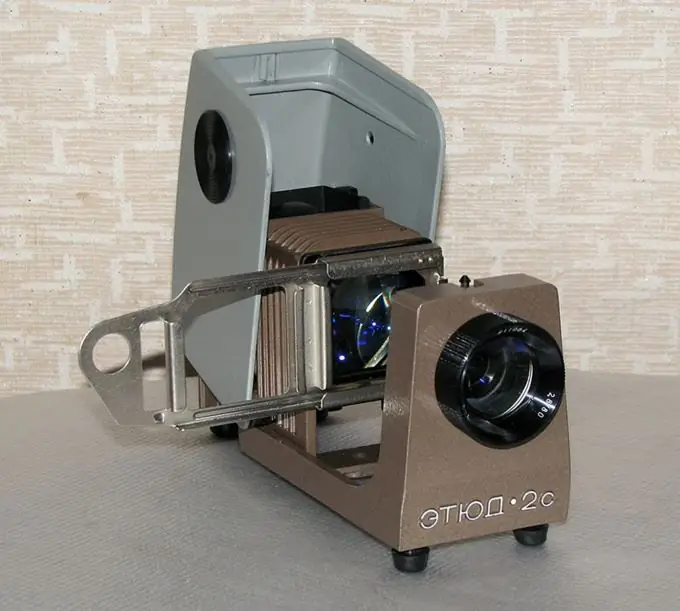
To study biology you need a microscope. How else can you see the cellular structure of a plant? In addition, the ability to see objects that are not visible to the naked eye will surely appeal to your children. You can arrange a whole show with a trip to the microcosm. A projection microscope is suitable for this purpose. You can do it yourself, giving a second life to obsolete photographic accessories.

It is necessary
- - slide projector (not automatic);
- - slide frames (metal with glass or plastic);
- - cover slips 2 mm thick;
- - old photographic film;
- - photo tripod or clamp;
- - screen.
Instructions
Step 1
Take a slide projector "Study" or "Screen". Prepare it for a regular display, expand the case. Place the projector on a table, but do not turn it on yet.
Step 2
If you find metal frames, insert glass into it. Place the study drug on top of it. Cover with another glass on top. Insert all of this into the frame holder, and it into the projector.
Step 3
Turn on the projector, point it at the screen. Set the sharpness by twisting the lens. The magnification will increase the further the projector is from the screen. If there is no special screen, then you can use a white wall, a sheet of matte white paper, a white canvas. Even better, if the canvas is covered with a layer of zinc oxide.
Step 4
It is also interesting to try to mount the projector vertically using a tripod or clamp so that the projection is directed to the ceiling. In this case, the observer can feel himself at the bottom of a drop of water with ciliates floating above his head and crawling amoebas. The design of the microscope is further simplified. The slide is simply clamped into a metal frame. A liquid preparation (a drop of water from a puddle, yeast culture, etc.) can be placed on top of it and covered with a cover glass. You just need to make sure that no liquid gets on the parts of the projector, since you are dealing with an electrical appliance. It should also be noted that the ventilation of the projector illuminator is not designed for long-term operation in this position.
Step 5
If an old photo enlarger remains in the household, then a projection microscope can be made from it as well. Place the test specimen in the film frame. In all cases, observations should be carried out in a darkened room or at night.


