The lion is rightfully considered the king of the animal world. This beast combines strength, dexterity, grace and beauty. Few can resist him, few can run away from him. In many cultures, lions were considered close to the gods. Lion images were often used in the heraldry of royal houses. And now we will look at how easier it is to draw a lion with a pencil.

It is necessary
a sheet of A4 paper, a sharpened simple pencil, an eraser (for erasing auxiliary lines)
Instructions
Step 1
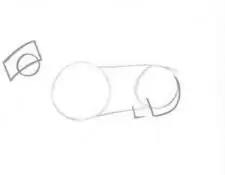
At some distance from each other, draw two circles with a pencil. Connect them tangentially with slightly curved upward lines. This will be a sketch of the lion's body. The large circle will be the front of the torso. Accordingly, the rear part is marked with a smaller circle.
Step 2
Draw the third and smallest circle slightly above and to the left of the front of the torso. Draw an irregular quadrangle here. Its base should pass through the center of the circle. These geometric shapes will later turn into a head. And under the circle that marks the back, draw two lines in the form of an angle, one of which smoothly turns into an arc.

Step 3
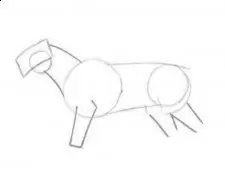
Next, connect the head to the front of the lion's body as shown in the picture, then outline the legs of the animal. At this stage, the hind limbs should be marked with straight lines. The front leg, on the other hand, is an unfinished pentagon extended downward.

Step 4
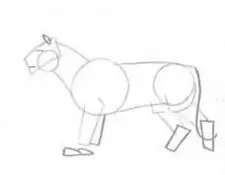
Now that it is already clear at first glance that this is an animal figure, take on a more detailed layout of the workspace. Now it makes sense to mark the ears, eyes and mouth on the head. Draw in the tail. Draw another corner next to the front leg. Draw the feet on the front paws of the lion in the form of horizontal droplets, and the hind ones - all the same irregular quadrangles.

Step 5
With droplets, mark the feet on the hind legs, on the front - connect the droplets with the upper parts of the legs using straight short lines, outline the mane with light strokes. Now you can see that the lion has already become like a lion.
Step 6
At the final stage, engage in drawing details: connect all the elements of the picture with smooth lines, smooth out sharp corners, erase auxiliary lines, outline the shadow with strokes and work out the mane. Take a closer look at the lion's face: darken the eyes, nostrils and mouth. Do not forget about the mustache and, of course, about such a charming brush on the tip of the tail.


