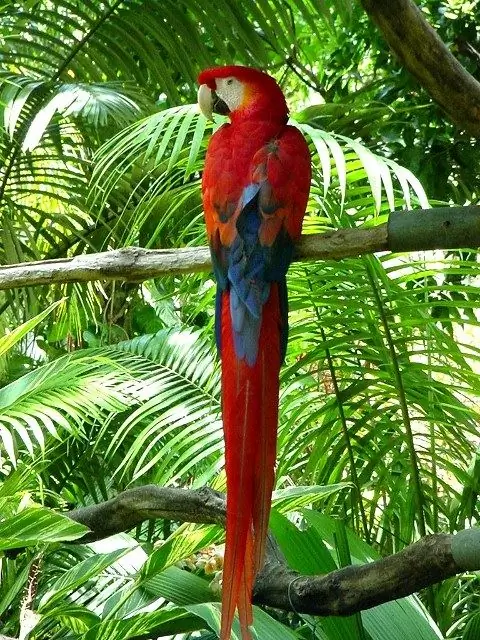
To learn how to draw, you need to do as many sketches from life as possible. True, this is not always possible. If you are interested in an exotic object, for example, a parrot, there is little chance of making a portrait of him - you will hardly be able to find him and make him sit still for the required amount of time. In this case, you can use a photograph of a bird.

Instructions
Step 1
Divide a sheet of paper located vertically into two parts with a horizontal line. This is the branch on which the parrot sits. The upper part of the picture (up to the branch) should be about one and a half times smaller than the lower one. Tilt the left edge of the branch down slightly. Don't make her outlines perfectly straight - she should look natural.
Step 2
Sketch the outlines of the parrot. The width of its body is about a quarter of the entire width of the leaf. And the length from the crown to the tip of the tail is about 4, 5 times the width. In this case, the tail is one and a half times longer than the head and body combined.
Step 3
Divide the part of the path that is above the branch into five equal segments. Two such segments will be occupied by the head. Draw it as a horizontal oval. Then draw a beak, the top of which is curved inward.
Step 4
Refine the shape of the body and tail. They form an elongated triangle, the upper corners of which are rounded. Divide the bottom corner of the shape into three separate feathers of different lengths. Add guidelines for the wings. The length of the right wing, which lies on top of the left, is approximately equal to the length of the tail. The shape of the wings is oval, slightly curved in the center.
Step 5
Use light strokes to mark the borders of each color on the feathers of the parrot. Outline a white spot on the head and blue spots on the wings.
Step 6
Color the drawing with gouache or acrylic. First apply the base, then on top of it you can draw the texture of the feathers. Paint the head of the parrot with rich red. Close to the neck, add a little lilac and white to the color - use this shade to paint over the middle of the back. At the contour of the wings, the color should become saturated again. Mark the tips of the wings with blue and light blue, and the tail with a mixture of burgundy and orange.
Step 7
Mix a few more portions of all the shades used in the palette. Take a round brush, about the size of the feathers in the picture. Dip the brush in thick paint and press it against the paper - the print of the brush will resemble a feather. Fill in the whole body of the parrot with these strokes. The direction of the strokes should match the direction of the growth of the feathers.


