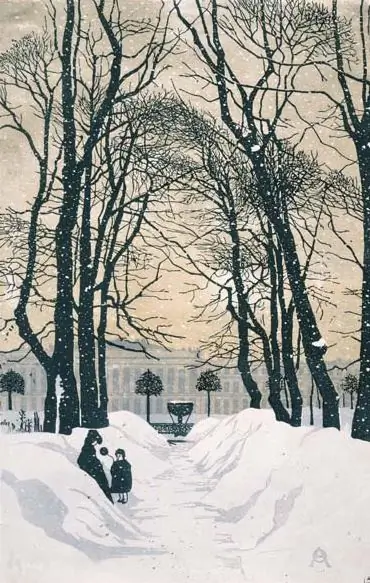
Painting a winter landscape is not at all boring, as it might seem at first glance. There is no riot of summer colors or the luxury of autumn dressed in gold and purple, but there is a clear rhythmic graphics and bright contrasts of shades of light snow and dark trunks. The trees shed their foliage - and the patterned black lace, woven into intricately curved flexible branches and sturdy trunks, was revealed. And when the snow falls, a fabulous picture of an enchanted white forest, speckled with coal-black strokes, appears.

It is necessary
- - White paper;
- - simple pencils, charcoal, ink, black watercolor;
- - eraser.
Instructions
Step 1
Draw from life or from photography - this way you can depict more interesting graphic patterns formed by crossed branches of trees, and achieve the best realistic effect. Place the leaf vertically if you are drawing a single tree, or horizontally if you are planning a composition of several trees.
Step 2
Draw a horizon line. Mark with weak lines the locations of the trees in the picture. At the same time, keep in mind that the objects closest to the viewer in the picture will be larger than the distant ones. Draw the axis of the tree trunk in the foreground from a lower point on the leaf, and as the trees are farther away, place their bases higher. These lines should follow the slope of the trunks, their curvature, curvature or slenderness.
Step 3
Start drawing out the outlines of the trees: mark the thickness of the trunks, gradually tapering upward, the directions of the main branches - they also have a thickness and unique curves. Transfer the outlines of thinner branches that have the most interesting curve and shape. Draw thinner branches one by one on the larger thick branches.
Step 4
There is no need, and it is impossible to depict all the branches of a tree exactly as they grow on a living tree, in the smallest detail. Try to capture the main directions and shapes of branches and trunks characteristic of each type of tree. Copy the most interesting outlines from a living tree.
Step 5
Create a beautiful clear pattern of the branches, avoid an incomprehensible jumble of strokes and monotonous, repeating lines, because all branches of a tree are unique, no two are alike. The thickness of the lines should also be of varying degrees of intensity. Try to draw artistic lines, performed almost without tearing from the paper, live, with uneven pressure on a pencil or charcoal.
Step 6
Draw the crowns of distant trees in less detail, while those closest to the viewer can even draw a textured pattern of the bark. Add some volume to the trees with the help of shading. Trunks and branches have a rounded cylindrical shape.
Step 7
If you depict trees in the snow, draw oblong snow caps on top of the branches, hiding the branches themselves in some places. Using an eraser, remove some parts of the branches and trunks and paint a layer of snow.
Step 8
Finally, highlight with bold strokes and lines the most expressive trunks and branches in the foreground. Where necessary, use shading to take the trees or their parts into the shade. Draw the surface of the ground, snowdrifts, dry blades of grass sticking out from under the snow.
Step 9
Add volume and depth to the drawing with transparent black watercolor. Tint the sky, leaving the clouds unpainted, and depict the thicker clouds with dark wide strokes and stripes. Combine the shaded areas with large gray spots, draw long falling shadows; add volume to the snow caps with a light tone, emphasize the dark trunks with black strokes.


