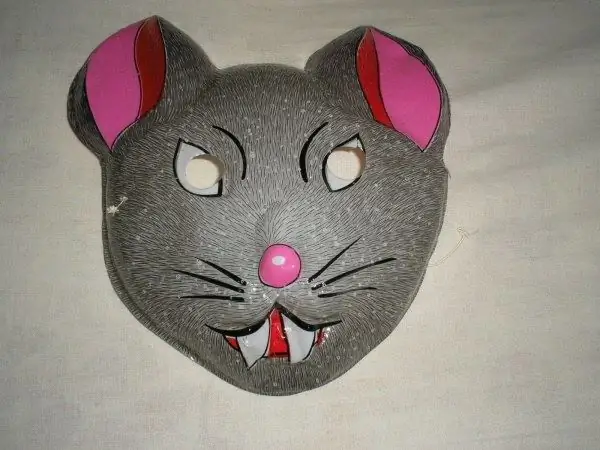
To make the holiday even more fun and colorful, you can arrange a masquerade. For this action you need a costume and, of course, a mask. If the costume can be sewn or remade from old clothes, making the mask will take some skill.

It is necessary
- - elastic jersey;
- - gray cardboard or velvet paper;
- - scissors;
- - glue;
- - soft wire.
Instructions
Step 1
Sew a hat in the shape of a chainmail helmet out of highly elastic gray jersey. Cut out the mask from gray cardboard or velvet paper, taking into account the features of the mouse's face. To get started, practice on the newspaper, and then use the best option as a template. If the mask turns out to be too soft, glue its edge from the inside with thick cardboard. Cut out the holes for the eyes, but do not cut off the cardboard completely, make the eyelids at the top.
Step 2
Bend the mask slightly so that it becomes convex. Make the tip of the nose pink or black, cut it out of cardboard or velvet paper and carefully glue it to the mask. Now poke it from the side and insert a soft wire to create a mustache. Now you need to cut the ears out of gray cardboard or velvet paper as well. Make the inner part of the ears out of pink paper or cloth. Glue the inside of the ear to the main part of the ear and attach to the mask.
Step 3
Tie a string or elastic to the mask. First, the hat is put on, and then the mask itself.
Step 4
There is another way to create such products, a simpler one. Cut out a mask in the shape of a mouse face from thick cardboard. Draw all the main details with acrylic paints and then color in. Cut a strip-hoop out of cardboard on the head, and then attach to the mask.
If you are looking for a better, brighter mask, try using papier-mâché.
Step 5
Make the shape of the future product from plasticine or air-drying clay. Spread Vaseline over the form. Cover it with 5-7 layers of thick paper. Each subsequent layer must be liberally lubricated with glue and smoothed so that there are no air bubbles.
Step 6
When the mask is ready, leave it to dry. After completely dry, start decorating your item. Attach ears, mustache, nose, gray velvet fabric or fringe can be pasted on top.


