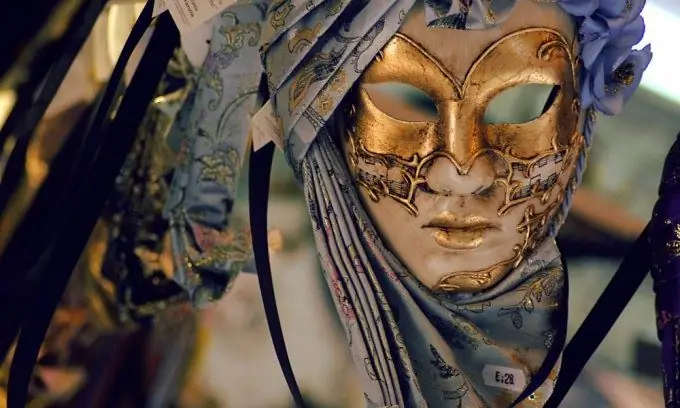
A hand-made mask will certainly attract the attention of others and give a lot of pleasure to create. The complexity of creating a mask depends on its type - cardboard ones are easier to make than others, and a plaster mask is considered the most difficult.

Instructions
Step 1
To make the simplest cardboard flat mask, you will need thick cardboard, colored paper and various decoration details (for example, foil, rhinestones, shiny self-adhesive film, feathers), as well as scissors, glue, a thin elastic band or rope for attaching the mask. The desired shape of the mask is drawn on the cardboard by hand or according to a template from the Internet, after which the mask is cut out and pasted over with colored paper (film or foil) and decorated. Holes are made along the edges of the mask for attaching the elastic. In this way, it is better to make masks-glasses, since they do not need relief, but they look very mysterious.

Step 2
To create a papier-mâché mask, you need to take clay or plasticine, glue, plain paper or newspaper, thick paper, scissors, brushes, gauze (bandage) and petroleum jelly. First you need to make the base of the mask. For the consciousness of the foundation, you need to grease your face with petroleum jelly, and apply clay or plasticine on top of it. Leave for an hour for the base to dry and harden. Carefully remove it, cut out the eyes and mouth, cover with gauze and leave to dry for a day. While waiting, you can tear the newspaper into small pieces.
Once the base is dry, you can continue. It is necessary to grease the base for the mask with petroleum jelly, then spread small pieces of paper dipped in water on top of it. When the first layer is finished, you need to apply glue on top. Then again you need to lay out a layer of wet pieces of paper, and glue on top of it. In total, you should get about 4-5 layers. A couple of layers should be made of thick paper to make the mask stronger. Leave the mask to dry and then prime with a solution of chalk and glue. After the primer has dried, the mask can be decorated (painted, pasted over with rhinestones).
Step 3
To create a plaster mask, it is very important to choose a suitable location. This material quickly stains everything around, so it is worth taking a separate area of the room, covering it with paper and newspapers. It is important to stock up on paper towels so that you have a quick cleaner on hand at any time. In addition to them, it is worth immediately preparing the rest of the necessary materials: plaster bandage, warm water, newspapers, fat cream, model clay, plaster primer, lace, paints and jewelry.
The plaster bandage should be cut into different strips - wide, narrow, large and small. The material should be enough to cover three layers. The prepared material must be put in a container and a basin with warm water must be prepared in advance. The number of strips depends on whether the mask will be all over the face or only half. If you stopped at the first option, it is worth doing the nostrils for breathing in the mask.
As a model, you need to find an assistant who can sit out for a long time without moving. Tell them to choose unnecessary clothes that you do not mind throwing away - the plaster gets very dirty. It is best to put the assistant in a horizontal position so that the body does not hurt from the motionless seat, put pillows under the head and neck. To make sure that a person is not allergic to the substances from which the mask will be made (especially to plaster), ask the extra to put a test piece of a bandage with plaster on the wrist per day.
It is important to tune a person so that in the process of work he does not move, does not frown, does not laugh. It is also necessary for the person to remove their hair under the shower cap and apply petroleum jelly to the face, especially in the area of hair growth, nose, eyebrows and eyes. It is highly recommended not to forget about preparation, so that the mask will easily move away from the skin and hair in the future.
After preparation, the main action begins. The base of the mask is applied - this is the first layer. The bandage strips are dipped in water, the excess water is squeezed out, and then applied to the face. Layers should be perfectly even, with no gaps. On the bridge of the nose, it is worth forming a cruciform combination of stripes in order to better hold. The bandage must be carefully smoothed out. Layer by layer of stripe should be used to the maximum, cutting out borders and notches. The second layer is applied in the same way, but using larger stripes.
After a short pause, so that the layers dry a little, you need to apply a third layer. At this stage, it is advisable to add a number of details. For example, to make a slightly larger nose or a prominent chin. It is important to display emotions. The weakest spots are around the eyes. At the third stage, they should certainly be strengthened.
Now all that remains is to wait until the assistant gives a sign that the mask has begun to move away from the face. It means that it is dry enough to be removed. Let your model wrinkle her nose, actively play with the muscles of her face, so that the mask better separates from the skin. Now you need to take it by the edges and pull it weakly. If the mask does not come off, you should tuck your fingers under it and slowly help it move away. So far, the mask has not frozen properly, you need to make small holes with a hole punch along the edges in order to thread the holding ropes through them. The mask will dry all night.
Finishing involves a lot of decorative details. Among them are additional stripes for decoration, beads, rhinestones, ribbons, feathers, sparkles. You can add a beak, for which a model clay is used, from which you can make raised cheekbones and other interesting details. After making the changes, you need to let the mask dry thoroughly again. Then you need to clean the surface with sandpaper to make the mask smooth. From the inside, you can glue it over with soft paper so that the plaster does not scratch your face. Colors are applied to the mask to give it brightness.
Once the decorating stage is completely finished, you can attach a string to the mask to hold it on your face. Also, after drying, it is recommended to cover the mask with a special varnish, which will protect it from moisture penetration and destruction.


