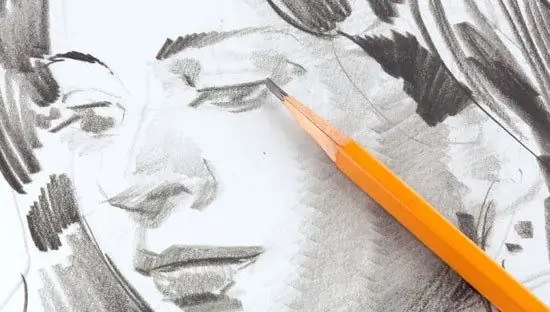
Learning to paint portraits is an important achievement for an artist. Having mastered this subtle art, you can confidently manipulate sanguine, charcoal, tempera, watercolor or oil. But it's better to start with a pencil sketch. Confidently using a simple lead, you will achieve a remarkable resemblance to the original.

It is necessary
- - tablet or easel;
- - white paper for drawing;
- - ruler;
- - hard and soft pencils;
- - pencil sharpener;
- - eraser;
- - paper napkins or cotton pads.
Instructions
Step 1
Attach a piece of loose drawing paper to your easel or tablet. Sharpen your pencils. Find the right photo to serve as a reference for your portrait. It is better to start with a face located in full face or half-turned. Do not take portraits with a lot of difficult to draw details. Depicting a beard, mustache, glasses or multiple wrinkles is the job of an experienced artist.
Step 2
Mark the foxes with a secondary net. Draw a rectangle the size of the future face. Draw a vertical line dividing it in half. Draw three perpendiculars - the first will mark the line of the eyes, the second will mark the tip of the nose, and the third will mark where the lips will be drawn.
Step 3
Referring to the photograph, outline the outline of the face. Pay attention to the shape of the chin and the fullness of the cheeks. Draw the outlines of the nose and eyes, as well as the line of the eyebrows. Keep track of the symmetry of the picture, focusing on the vertical line dividing it in half. Draw in the cheekbones and eye sockets, otherwise the face will look flat.
Step 4
Use a soft pencil to highlight the nostrils, eye contour. Darken the pupil and draw the crease of the eyelid. Add guidelines for the lips. Examine the drawing and erase the guide lines. Continue further work with a soft pencil.
Step 5
Cover your face with thin strokes of a lead and rub it with a paper napkin or cotton pad. Start blending the shadows to shape the face. Darken the crease of the eyelids, temples, the inside of the eye sockets and the sides of the nose. In the area of the nostrils, increase the pressure of the pencil. Trace the outline of the eye, shade the iris and place a white highlight in the pupil with the corner of the eraser.
Step 6
Trace the outline of the mouth. Make the upper lip darker, put a highlight in the middle of the lower lip - this will give it volume. Use the corner of an eraser to draw a narrow white line along the bridge of your nose. Use thin pencil strokes to mark the shadow at the corners of the mouth and under the lower lip.
Step 7
Start working on your hair. Mark the parting line and draw the strands, drawing the pencil from the parting to the ends of the curls. Change the pressure of the pencil to create a patchy color. When finished, go over the hair with a cotton pad, blending the strokes. Draw a few more pencil lines over the feathering. Shade the curves of the curls and rub the lead again.
Step 8
Use the corner of the eraser to lighten the highlights on the hair, leading it from the roots to the ends. Place a shadow under the chin, marking the line of the neck. Examine the drawing and brush off the remnants of the lead. The portrait is ready.


