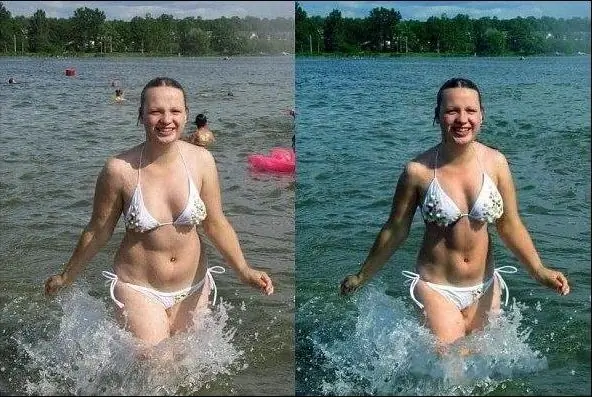
It is difficult to find a woman who would be completely satisfied with her figure. Some women show groundless dissatisfaction with their appearance, while others have good reason to be ashamed of their figure. Nevertheless, everyone dreams of beautiful photographs, and even if your figure is far from perfect, you can correct it in the photo using Adobe Photoshop, making some parts of the body slimmer.

Instructions
Step 1
Prepare for work a photo in which you want to get a slimmer figure. The photo should be of high resolution and high quality - it depends on how realistic and accurate the finished work will be.
Step 2
Load the photo into Photoshop, and then open the Filter section in the main menu and select the Liquify filter from the list that opens. The photo will open in a new window. On the left side of the window, you will see a toolbar - select the "Compress" icon on it or press the S key.
Step 3
In the right part of the window, set the required compression values, adjusting it - these values depend on the type and size of the photo. Set the size of the brush for processing the photo so that it is slightly larger than the size of the objects that you will process with the brush. You can also adjust the brush hardness, pressure and saturation.
Step 4
After setting the necessary indicators (for example, choosing a brush size of 150), scale the photo, zooming in on the part of it that needs to be reduced, and start clicking once on the desired area in the photo, making sure that the compression is uniform and realistic.
Step 5
Do not drag the brush while holding down the left mouse button - you just need to click on the desired fragment of the body to make it shrink. If you accidentally make a mistake, click Cancel (Ctrl + Z).
Step 6
After processing one part of the body, move on to another - this way, you can make any figure slimmer and more attractive. When finished processing, click OK and save the photo under a new name.


