In order to make a robot, it is not at all necessary to have expensive material and programming skills. This is proved by one of the inventors who constructed the robot from paper clips. Following his instructions, you can easily make a robot at home.

It is necessary
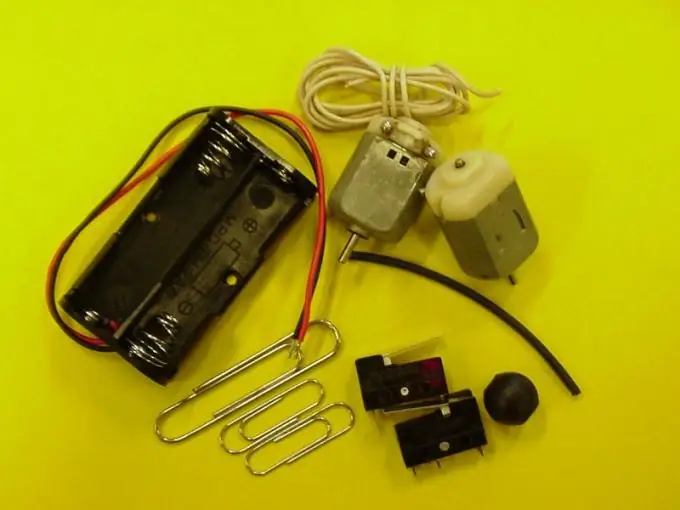
- - 2 motors (1.5 W each);
- - 2 SPDT switches;
- - 2 batteries and a case for them;
- - 1 plastic ball with a through hole;
- - 3 paper clips (1 large, 2 medium size);
- - wiring.
Instructions
Step 1
After you have prepared the necessary material, proceed to the manufacture of the robot. Cut 13 wires, 6 cm long. Take pliers or a knife and remove 1 cm of insulation from both sides of each wire. Next, using a soldering iron, attach 2 wires to your motors and 3 to SPDT switches.
Step 2
Then solder 1 more wire to the battery case. Note that there are 2 factory wires (red and black) on one side of the case, so attach your wires to the back. After that, turn the case up and glue the SPDT switches in the form of the Latin letter V. After waiting a few minutes, glue the motors on the sides of the case.
Step 3
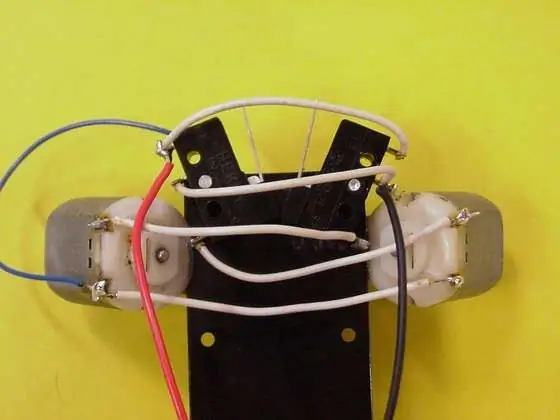
Take a large paperclip. Bend it into a straight wire. Take a pre-prepared plastic ball and thread it through it. Bend the wire so that the ball is in the middle. Glue both ends to the battery holder. Here you need to show patience and diligence. You need to solder all wires as shown in the photo.

Step 4
Take 2 paper clips and unfold them, giving the shape of the "tendrils". They will serve as an antenna. Glue them to the SPDT switches, in the center of the Latin letter V. Put rubber tips on the axis of the motors, you can use cuttings from the insulation of your wires.
Step 5
The final step. Insert the batteries to drive your robot. If you want to stop him, get them out. Let this robot be your first and not the last development. Develop and improve your skills!


