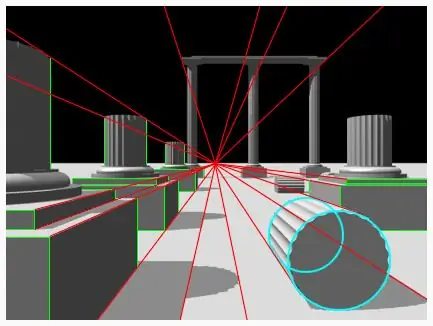
The art of painting requires not only natural talent, but also perseverance and patience, which are necessary for a novice artist in regular studies and training. It is impossible to learn how to draw beautifully and correctly without knowing certain rules and laws of painting. One of these most important laws is the rule of perspective - by observing the perspective in the drawing, you will not only make it realistic and harmonious, but you will also be able to use various types of perspective as a means of artistic expression.

Instructions
Step 1
Perspective is the transfer of three dimensions of the world around you onto a flat sheet of paper. For the correct display of perspective, which will show volumetric images in a two-dimensional format of a sheet of paper, you need to know some rules. They concern all genres of drawing - both landscapes and still lifes, and portraits of people.
Step 2
Begin your drawing by drawing the outlines of the object you want to depict. Try to convey the height and width of the object as much as possible on paper, and then draw auxiliary lines that will help you understand where the closest point of the object is, and where is the farthest.
Step 3
Distribute the space within the outline into zones and determine the slope and path of the various lines of the drawing. Refine the subject in the drawing, achieving volume and perspective. When drawing something, always keep in mind that distant objects always appear smaller than close objects.
Step 4
Determine the spatial plan of your drawing and understand which objects are closer and which ones are farther away. This will help to build the correct perspective and depict the real dimensions of objects just as if you saw them in reality. Subdivide the space of the drawing into near, middle and far plans.
Step 5
Also define the horizon line in the picture - it depends on where exactly the point of view of the picture will be. When sketching a future drawing, always draw a horizon line on it, so that you can later navigate along it in your work. If you draw objects from such an angle that their top edges are not visible, the horizon line runs along the top edge of the drawing.
Step 6
In building perspective, it is also important to know what vanishing lines are - their bundle is connected on the horizon line, and these lines come from any object in the drawing. If there are several parallel lines in the picture, they all go to the horizon line and are connected on the horizon to one point - to the vanishing point.


