There are a lot of migratory birds in the world. They belong to different families and even to different orders. They differ in size, color, beak, wings and legs. But you can also see the similarities. Having learned how to draw two or three birds, you can easily depict everyone else.
It is necessary
- - paper;
- - 2 simple pencils of different hardness.
Instructions
Step 1
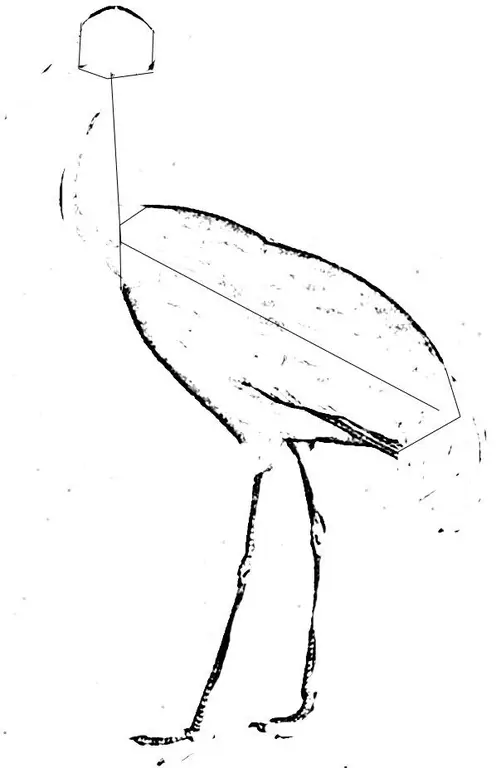
Start drawing the crane with the guides. It is better to lay the leaf vertically, since this bird has long legs and neck. Draw one guide approximately in the middle of the sheet at an angle of approximately 30 ° to the bottom cut. The second guide is strictly vertical. Both lines are about the same length. Draw 2 more vertical lines from roughly the middle of the first guideline.

Step 2
Draw a large oval so that the slanted line is its long axis. The oval should be quite wide. This will be the body of the crane. Draw the edge of the wing parallel to the long axis, and draw a round or oval head at the top end of the vertical guide.
Step 3
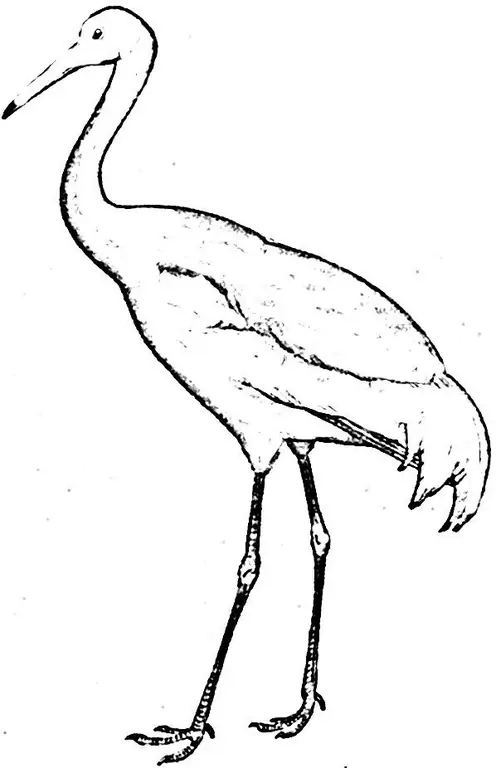
At equal distances from the vertical line, draw two parallel curves, connecting the lower and upper ovals. Draw a long, triangular beak to the front of the head. Draw long legs. They are almost straight, but about in the middle there are thickenings - the knees. Draw the edge of the wing with a zigzag line.
Step 4
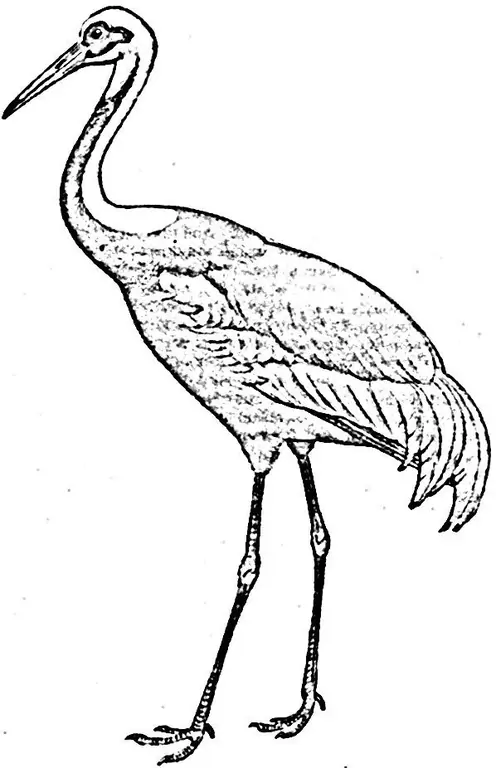
Trace the outlines with a softer pencil. Draw the eye. Draw feathers using wavy lines and freehand strokes. In the same order, you can draw a heron, stork or ostrich. These birds have a similar structure, but some parts of them are different. For example, an ostrich has a tail, while a stork has the edges of its wings painted black.
Step 5
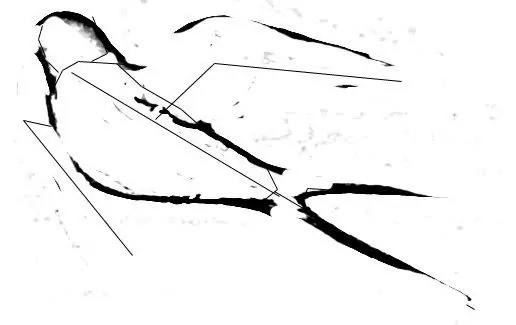
Start drawing the swallow from the guide too. It can be positioned at any angle to the horizon. This rather long line runs through the entire body of the bird. Divide it into about 3 parts. Draw the wing guide to the mark separating the upper third, it goes almost perpendicularly. This line is roughly equal to the top of the guideline. To convey the kink of the wing, from the end of this new segment, draw another guide, at an angle of about 135 °. Mark the direction of the second wing, it is not fully visible.
Step 6
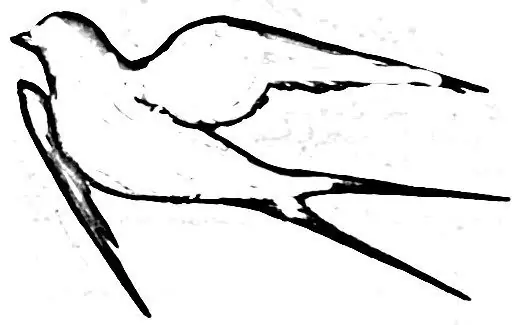
Sketch out the outlines of the body. The swallow's head is an irregular circle. The body most resembles a blob or airship, and the tail looks like two long triangles. Please note that the tail does not bifurcate immediately from the narrow edge of the drop, there is a small segment between these two parts, formed by two parallel straight lines.
Step 7
Remove extra lines. Draw the contours with a soft pencil. Draw the plumage. On the wings, this is best done with long lines parallel to the bird's back. On the body, these can be just free-form spots and thin strokes.


