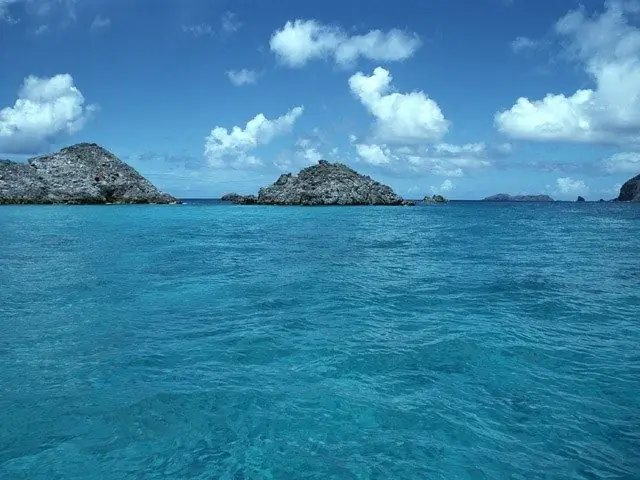
If you want to paint the sea, one blue pencil or azure paint is not enough. Only at first glance the water surface is monotonous. If you look closely, it has spots of a wide variety of shades. They need to be noticed in order for the drawing of the sea to turn out to be realistic.

It is necessary
- - paper;
- - the pencils;
- - paints;
- - palette;
- - brushes.
Instructions
Step 1
Use a 2T or 4T pencil. Mark out the sheet, indicating the size of all objects in the drawing. Draw a light line for the horizon, sketch out the outlines of rocks, islands, a ship, etc.
Step 2
Take a closer look at the color of the water surface that you want to portray. You will notice a smooth transition from one shade to another. Their presence depends on several factors. The depth of the sea in a particular area affects the color - near the coast and in the shallows it will be lighter, the color of the bottom will be added to the color of the water. The landscape of the seabed is also important - dark spots will be barely noticeable on the water surface if there are hills or depressions under the water. Shadows from clouds and clouds can fall on the surface, they are especially noticeable in bright sun. The boat, ship, rocks, caught in the "frame", also cast a shadow, changing the color scale of the sea. Also pay attention to the distance between you and the point you are drawing. Towards the horizon, the water will look darker and darker.
Step 3
These nuances can be seen in the photograph (see illustration for the article). Here, a light azure semicircle is clearly visible at the bottom edge of the frame. This is followed by a stripe of slightly more saturated light blue. A stripe of about the same width is darker, and blue is seen as a thin line along the horizon. Glare from sunlight falls on the sea surface in light stripes on the sides, as well as in two lines at an equal distance from each other in the center.
Step 4
Apply color to the paper, defining all the listed features. If you are drawing with pencils, pastels, or wax crayons, cover the paper with a uniform web of strokes. Use different shades, and overlay strokes of different colors side by side to create the illusion of mixing. Leave areas that are covered in glare unshaded.
Step 5
When working with watercolors or ink, the principle of work is slightly different. Mix the required shades in the palette. Apply them with a wide brush, spreading the paint evenly over large areas. You can first walk on the paper with a clean wet brush, and immediately after that use paint - so the boundaries of the strokes will blur on the paper. While the paint has not dried, use a clean thin brush to wash away the highlights, i.e. collect excess color by revealing a white sheet.
Step 6
In the case of using opaque paints - gouache, oil, undiluted acrylic - apply the color to the entire surface of the sheet. When the paint is dry, paint the highlights with white using a thin brush.
Step 7
To make the image of the sea realistic, you need to draw small ripples and large waves on its surface. To do this, consider each such wave rise separately. Draw it like a regular volumetric object - conveying shadow, partial shade and highlights in different shades.


