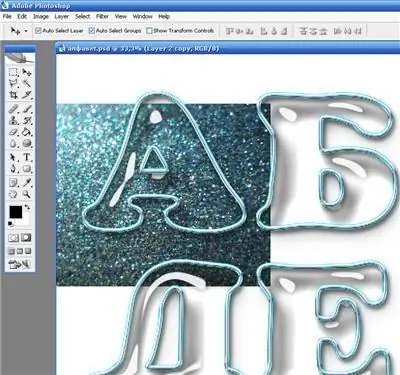
Photomontages, collages, scrapbooking, and many other creative jobs often require beautiful lettering, and for those lettering, you can create original and eye-catching letters using Adobe Photoshop styles. An example of such letters is a transparent volumetric font that resembles glass figures filled with sparkles or other decorative elements.

Instructions
Step 1
Open a new document and create a canvas with a white background of any size. From the toolbar, select the text tool and, with any readable font you like, write on a white background all the letters of the alphabet, as well as numbers and punctuation marks.
Step 2
Copy the text layer (Ctrl + J) and then right click on the text layer and select the Rasterize type option. Turn off the previous text layer by clicking the eye icon.
Step 3
Find and download the Water Drops style for Photoshop, or find it in the list of styles if it is already installed in your program. Using Scale Effects to change the style to fit the size of the letters, apply it to the text layer to create a glass effect.
Step 4
Select the glass letters by Ctrl-clicking on the layer, then create a new layer, open the Edit menu and choose the Stroke option. In the settings, specify the desired thickness of the outline of the letters. The outline must be outside - set the Outside option. Click OK and then click Deselect to deselect.
Step 5
Apply another style to the stroke from the Styles palette - Silver Style. The outline will turn silver. Find a separate image of the texture with which you will fill the letters - for example, a photo of silver sequins. Place the found picture as a new layer under the layer with letters in the palette. Reduce the size of the picture and fit it to the first letter.
Step 6
Create a copy of the image with texture on a separate layer and alternately substitute the picture for each letter and number, and cut off the excess parts of the image that go beyond the outline of the letter.
Step 7
To keep the upper part of the letter transparent while keeping the bottom full, zoom in and edit each letter one at a time, selecting part of the fill layer with the Lasso tool. Press Delete to delete part of the image inside the letter.
Step 8
Refine the letter backgrounds with an eraser. The cut border of the image can be blurred with the Blur or Smudge tool. To make the contents of the letter look three-dimensional, apply the Bevel and Emboss effect to it in the layer settings.


