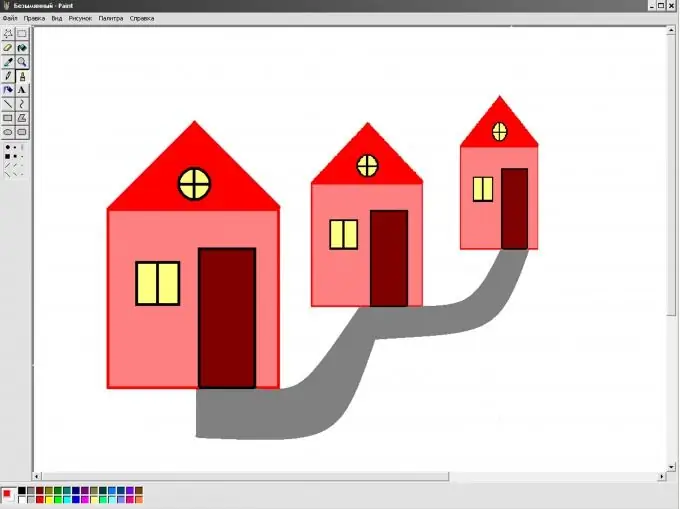
The process of creating an image in virtual space is fundamentally different from the usual drawing on paper, canvas and fabric. But the work of a virtual artist is no easier, and the widespread opinion that “the machine will do everything by itself” is wrong.

It is necessary
"Paint" program
Instructions
Step 1
Go to the start menu on your computer. Select "All Programs", then find the "Standard" section, where you will see the "Paint" program. This is the simplest graphic editor with which you can learn how to draw a graphic image on a computer.
Step 2
Having opened the program, you will see a menu at the top, which includes the following items: "File", "Edit", "View," "Picture", "Palette", "Help". A very important function that you will definitely need is the cancellation of the performed action. To undo the previous step, click "Edit" - "Undo".
In the upper left corner there is a toolbar, at the bottom there is a color palette.
Step 3
Provide a future sketch of your drawing. For trial work, choose the simplest images of the correct geometric shape. Try to draw a house. For all its apparent complexity, this is an ideal option for beginners, because it mainly consists of squares and rectangles.
Step 4
To draw a graphic drawing, select the desired color from the palette. Click on the "Line" tool. Form a square on a white working field by sequential connection of lines. Hold down the Shift key to draw perfectly straight lines. Then draw a triangular roof (Fig. 1).
Step 5
Select "Rectangle" from the toolbar. Draw a door and a window. Hold down the Shift key to create a square window.
Step 6
Then use the Paint Bucket tool. Select the desired color in the palette, hover the mouse and click once in the area to be painted (Fig. 2). If the whole drawing is colored, then cancel the action and carefully paint over the loosely connected corners of your "house".
At this stage, you can add any necessary elements to the image (partitions on windows, doorknobs, curtains, etc.)
Step 7
Now build a small "village" from one house. Use the Selection tool. Circle the house and click Copy. Then click "Insert". You will have two identical houses on your work field. Shift the house copy while holding down the Shift key. This will help maintain the proportions of the house while shrinking. Position the small copy above and to the right of the main picture. Do the same with the copied image. As a result, you should have three houses (Fig. 3).
Step 8
Now, using the Curve tool, connect all the houses with paths. Paint over the paths using the already familiar Fill tool (Fig. 4).


