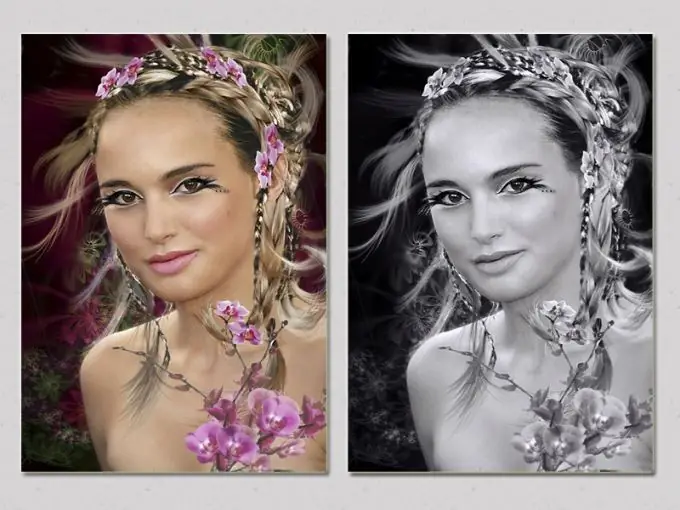
It happens that a photo looks hopelessly spoiled due to poor lighting, reflections on the skin, inappropriate shadows, distorted or poorly matched colors. If you translate such a picture into black and white, the distractions will disappear, it will become clear and expressive, dramatic and even mysterious. This can be done in almost any graphics editor. But the greatest opportunities are provided by Adobe Photoshop.

Converting a photo to black and white using the Lightness channel
Open the photo in Photoshop and place it in the Lab color space. To do this, run the command Image - Mode - Lab Color ("Image" - "Mode" - Lab). Now open the Channels panel and click on the Lightness channel. Select the command Image - Mode - Greyscale ("Image" - "Mode" - "Grayscale"). You will be presented with a dialog box asking if you want to discard information from the rest of the channels. Click OK.
Go back to the Layers palette - "Layers". Activate the "Background" layer and duplicate it using the keyboard shortcut (Ctrl + J). If the photo is too dark, change the blending mode of the top layer to Screen - "Screen". For a lighter image, use the Multiply mode. Adjust the opacity of the top layer (parameter Opacity). This is the easiest way to get a high-quality black and white image.
Black & White
This function can be called using the menu Great New Adjustment Layer - "Create a new adjustment layer", which is called the icon in the panel Layers - "Layers". You will see a window with default settings. At the top of it you will find a drop-down list of preset presets. Try applying one of these to your image. Next to the list of presets is the Auto button. It is used for automatic image processing.
To manually adjust the settings, click the double-headed arrow button and move the mouse pointer over the area of the image that you want to change. Click on this area and, while holding down the left mouse button, move the cursor to the left - to make the selected shade darker or to the right - if you want to lighten it. Photoshop automatically detects the color of the selected area and changes the position of the corresponding slider.
In addition, right in the function dialog, you can convert the image to duplex. To do this, check the Tint - "Tint" parameter. A small colored square next to it calls up a palette of colors. In the latest version of the program - Photoshop CC, you can work with a layer mask right in the function dialog box by clicking on the Masks icon. You can adjust the density of the mask, feathering, refine the edges, invert it.
To save the found settings for future use, click on the small button located in the upper right corner of the window. Select the Save Preset item from the drop-down list and enter a suitable name. The main advantage of the Black & White function is the fine-tuning of the image. It provides the ability to control more shades in addition to the three primary colors. And also allows you to change the parameters of only one selected color.
How to create a contrasting black and white image
Load the photo into Photoshop and set the foreground color to black and the background to white. Now create a Gradient Map adjustment layer. If you want to lighten the resulting image, then in the dialog box, click on the selected gradient. The Gradient Editor will open. Hold down alt="Image" and drag the start stop to the center of the gradient to create a new color stop.
Your new limiter is black, so the image looks even darker at this point. Double click on this stop to open the Color Picher. You need to drag the mouse pointer along the left edge of the color picker and pick a suitable shade of gray. Release the mouse button periodically and check how the image looks. When you are satisfied with the result, click OK to close the Color Picker.
To fine-tune the color, move the control you created to the left or right. Note, however, that moving towards darker tones makes the image lighter, and vice versa. You can see the result of the conversion only by releasing the mouse button. If you lower the Opacity of the Adjustment Layer a little, you can get an interesting result with bold colors and a slight blur effect.


