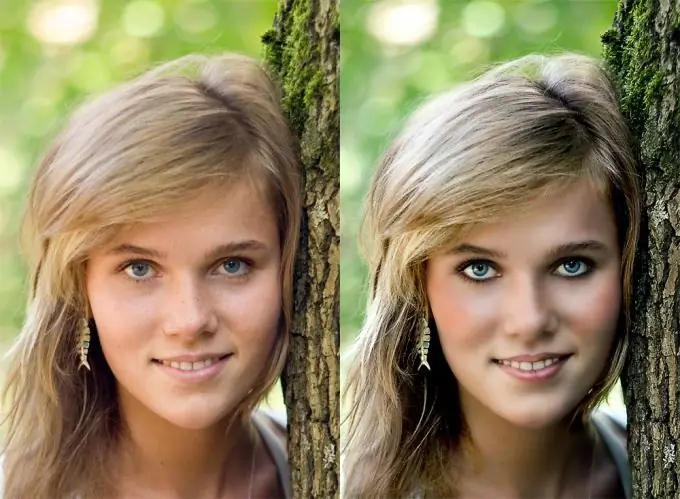
Retouching and color correction is an essential step in the processing of any photo, and every photographer and designer who claims to a certain level of skill should have color correction skills. Competent color correction can turn an ordinary photo into a stylish and original image, and you can achieve this effect quite quickly if you have the skills of working in Photoshop.

Instructions
Step 1
Open the photo you want to process in the program and duplicate the main layer (Duplicate Layer). Then on the duplicate layer, using the Healing Brush Tool on the toolbar, retouch the skin of the person shown in the photo to remove minor defects and irregularities. After that open the Layer menu and select the New Adjustment Layer -> Color Balance option.
Step 2
Adjust the color of the photo by changing its main background - for example, you can give the photo a subtle sepia tone by adding more yellows and browns, while keeping the primary colors. Create a second adjustment layer (New Adjustment Layer -> Selective Color) and darken the red shades in the settings of the second adjustment layer.
Step 3
Create two ordinary new layers and change them - on the first layer set the blending mode to Screen, and on the second layer set the mask (Add layer mask), making sure that the main colors of the palette are selected by default, and then use a small semi-transparent Brush tool to process some fragments of a photograph. Brush too dark places, lighten eyes, highlights and volumetric fragments in the frame. Merge the layers.
Step 4
Now duplicate the image and put it in CMYK mode. On the previous copy of the photo, select the green channel from the list of RGB channels, select it and copy, and then in the duplicate CMYK also separate the photo into channels.
Step 5
Select the black channel and paste the copied green channel into it. You will see that the colors in the photo will take on more saturation. Optionally add a background texture to the image and process it with the Gaussian Blur filter.


