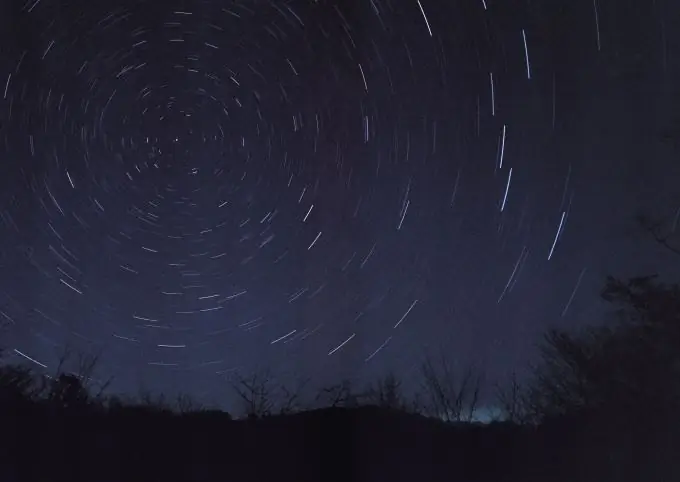
The starry sky excites the imagination of not only artists, but also photographers. But often, when people try to photograph stars, most often they get unintelligible spots from street lamps, or, if the shooting was carried out outside the city, then just dark pictures without any stars. How do you capture the night sky correctly to get a great shot?

It is necessary
- high-aperture optics
- telescope
- flashlight
Instructions
Step 1
If you seriously decide to capture the beauty of the constellations, then it is best to choose the time for this between mid-August and mid-September. As you know, during this period the most stars fall from the sky, and they are seen best of all, because the air is dry and transparent. You need to photograph stars outside the city, away from sources of artificial lighting. Choose calm weather, as the wind can shake the tripod, and with this kind of shooting, this can greatly spoil the frame. In addition, the trees in the foreground will also turn out to be smeared in the photo.
Step 2
There are two types of photographs of the starry sky. At first, the stars are displaced and leave glowing trails. In the photograph, it appears as light streaks against a dark sky, arranged in concentric circles around the pole star. The fact is that the Earth rotates, the stars are displaced from their position. It is impossible to notice this shift with the eye, but if you use a slow shutter speed, the camera will definitely fix it. Another type of photograph is where the stars are captured as points of light. To take such a photo, you need to have good high-aperture optics. You will need a lens with a fast aperture, at least f / 2.8, but the more the better. The shutter speed for this type of shot is about 30 seconds, the fastest being 1 minute. For photos of the first type, even a wide-angle lens is suitable, for the second, on the contrary, it is better to take optics with a less wide angle.
Step 3
If you want to use the foreground, for example, trees or the outlines of the terrain, then do not use a wide-angle lens, as it will not be possible to capture everything in the frame at once: both the sky and the foreground. What to focus the picture on is up to you, you will not be able to aim at the trees and at the sky at the same time. Decreasing the aperture to increase the depth of field will also not work, there is so little light.
Step 4
For those who are interested in photographing space objects, such as planets, galaxies or nebulae, a telescope will come in handy. There are models that are specifically designed for photography - they rotate slowly so that there is no displacement in the image due to the rotation of the Earth. Such pictures are taken with a very long exposure, sometimes reaching several hours.


