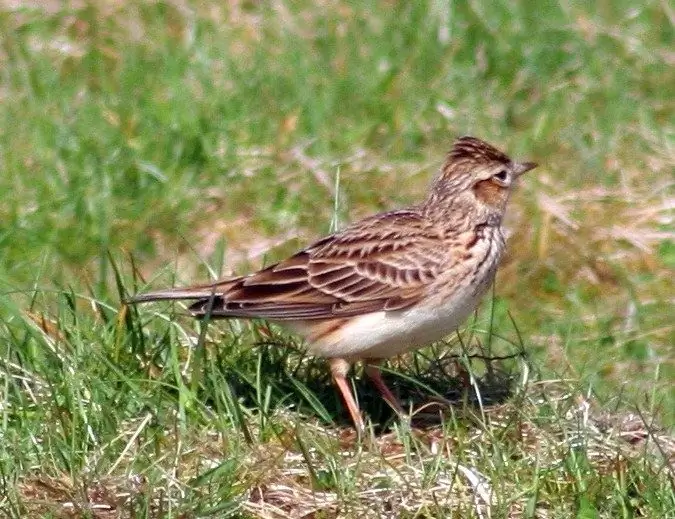
The lark can be found in the field, and in winter, when the forest and field spaces cease to pamper the birds with an abundance of food, they are seen near the suburbs, where they move in search of food. The color of the lark is dim but attractive. The lark displays its trills, rising high into the sky and hovering in place.

It is necessary
- - Pencil;
- - paper
Instructions
Step 1
Take a close look at the bird before picking up a pencil. If you do not have the opportunity to observe it in its natural habitat, find some photos or illustrations. On the yellow or gray back of the lark, there are motley blotches. The small head of the bird is decorated with a small tuft, and brown variegated feathers flaunt on the wide chest. Above the dark eyes of the lark is a light eyebrow.
Step 2
Having previously selected the pose for the bird in the figure, mark the frames on a sheet of paper in which it will fit. Sketch the head in the form of an oval and from it draw a line that defines the slope of the torso and the position of the lark's tail. Sketch the outline.
Step 3
Draw the thin beak of the bird, then enter the tone. Determine where the wing will land. Define it and then highlight it brighter with a pencil. Also outline the lines of the chest and back, which run almost parallel to the lines of the wing. Circle your head. Express the lines of the neck brighter, making the transition through it from head to back smooth. Perform the same gradual transition from the neck to the chest.
Step 4
To add volume to the body in the foreground, draw a wing, specifying the direction of the feather and shoulder. Do a reflex on the abdomen. This technique allows you to display a gleam of color to obtain a three-dimensional effect of the figure. It is necessary to leave the belly light and darken its periphery.
Step 5
Work on the head and beak in more detail. Darken the back of the head, the base of the beak on top, part of the chest to the shoulder and neck. Refine the legs by adding a darker tone to the base. Shade the back and wing, select the tail and the transition to it from the back.
Step 6
Make the eyes black and don't forget to leave highlights. Lighten the area above the beak opposite the eyes with an eraser. To create the background, loosen it under the beak and behind the neck and reinforce it near the lightest areas of the head. This will make the picture more expressive.


