It is not for nothing that lately there has been a growing saying among the people that Photoshop is the best make-up. Indeed, you can adjust the appearance in this program as you like, while this process is not at all complicated. You can even use this program to see if a particular makeup will suit you. Today, let's talk about how to change the color of the lips in this program and add some gloss to them. How to do this - in the instructions below.

Instructions
Step 1
First select the photo you would like to change. Open it in Adobe Photoshop using the "File" - "Open …" command.
Step 2
Now select the Lasso Tool. Use it to carefully outline the lips in the photo.
Step 3
Next press Ctrl + C and then Ctrl + V to copy the lips and paste them on a new layer. It is with him that we will now work.
Step 4
Now bring up the color balance window. To do this, press Ctrl + B. Once the window has appeared, start moving the levers. Move them until you are completely satisfied with the lip shade.
Step 5
Now select an eraser with very soft edges and use a low intensity. After that, gently work the edges of the lips to make them look more natural.
Step 6
Now add some gloss to your lips. To do this, go to the "Filters" - "Artistic" - "Plastic warp" tab. Adjust the filter settings the way you like best. Change the values until you are completely satisfied with the result.
Step 7
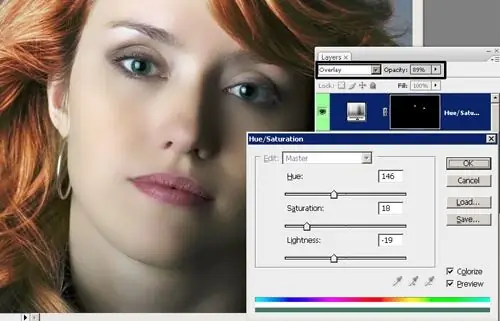
Now in the palette with layers change the layer blending mode. You can choose different blending modes, it depends on your specific image. Try the "Overlay", "Screen" or "Lighten" modes.
Step 8
Now change the opacity of the lips layer to get the most realistic effect.
Step 9
You can add gloss to your lips in other ways as well. To do this, create another empty layer above the lips layer. Choose a small, soft brush, lower its intensity a little and put a couple of white spots on the lips - where there are usually highlights. After that, take the Blur tool, reduce the intensity to 50% and go over these spots with the tool. If you add gloss this way, the lips will look a little glossy, as if they had been applied with a glossy lip gloss.
Step 10
After that, do everything as in the previous step - change the blending modes of the layers to those that suit you best (you can not change the blending mode of the upper layer), adjust the transparency.
Step 11
Now connect all the layers (for example, using the command Ctrl + E) and save the image. All is ready.


