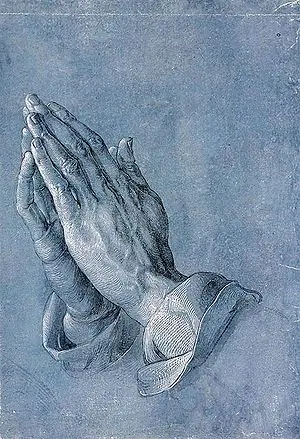
How interesting it is sometimes to get distracted from reality and just draw for your pleasure: draw whatever you want. However, as soon as you take on this business, you immediately understand that not everything is so prosaic. Drawing requires certain knowledge, spatial thinking, perseverance and training. After all, the skill is gained over the years.

Instructions
Step 1
People are especially difficult for novice artists. Each of the parts of a person's body is drawn in a different way, so let's first learn how to draw hands.
Step 2
Let's start drawing our hand from a 2D image, so draw a 2 * 3 cm rectangle on a piece of paper first. This will be the palm. Then draw a second rectangle of the same type. These will be the fingers of the hand. Start drawing your fingers with your thumb.
Step 3
Hold your palm in front of you and project the image proportionally onto the paper. From the top left corner of the bottom square, draw a diagonal line extending slightly from the side of the square. You should end up with a wedge that doesn't reach the bottom. Notice how your own thumb is positioned, how it attaches to the palm of your hand. Now to the drawn wedge at an angle corresponding to the real one, add a rectangle that will be the body of the finger, narrowed towards the top.
Step 4
Get on your wrist. Constantly compare the drawing with your hand, keep the proportions in mind. You will also outline the wrist in the shape of a rectangle, only with a side smaller than the palm. So, you have drawn the base of your hand.
Step 5
Draw bumps protruding into the palm of the hand at both bottom corners and outline them with semicircular lines. Move to the top rectangle. Divide the shape into four parts, equal to the width of your fingers. Draw vertical borders for each and mark the height of the fingers with horizontal strokes. Round off their edges and mark the phalanges. Do not deviate from the proportions.
Step 6
Go back to your thumb, you will be rounding the edges too. There is a separate technique here. To draw this finger, you will have to turn to smooth curved and concave lines. Experiment and don't be afraid to erase the wrong lines - it is better to make corrections in hot pursuit.
Step 7
Well, you've drawn a rough draft of the hand. Next, correct the drawing. Round the edges, paint in additional details and shadows. And don't forget to look at your own hand!


