The Internet platform YouTube is growing in scale every year and is constantly improving its services, allowing channel owners to make money on their videos. But in order to start getting paid for your content, you need to apply for channel monetization. To do this, you should do a few simple manipulations, which will be discussed below.
It is necessary
- - access to the Web,
- - Google account,
- - YouTube channel.
Instructions
Step 1
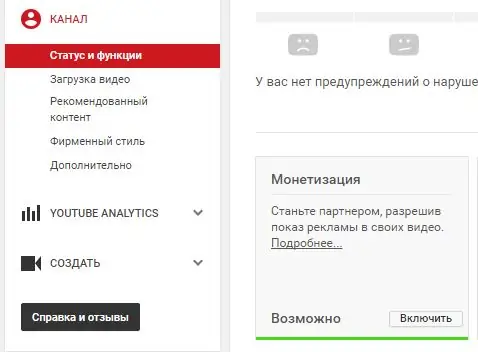
The first step is to open the "Channel" item in the control panel, and then go to the "Status and functions" section. Under the new YoutTube rules, you will need to connect to Adsense anyway, even if you will not work there in the future. To start filling out the necessary data to make money on YouTube, on the page that opens, find the item "Monetization". If you have previously filmed a video on your channel, and your videos do not contain forbidden information, or you are just starting to work with YouTube, then this paragraph will say that monetization is possible for you. Next, click on the "enable" button. After that, your screen will display the steps you need to take in order to enable monetization.
Step 2
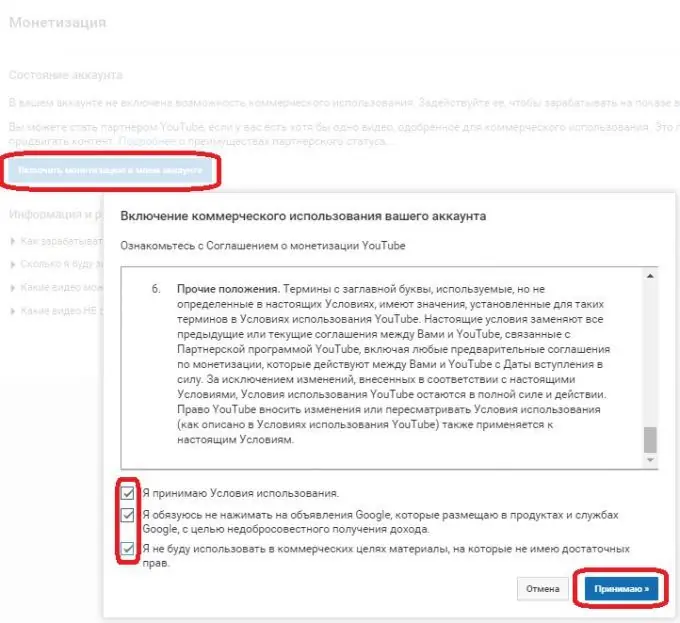
In order to start monetizing the channel and allowing companies to advertise their products on the track of your video, you need to get 10,000 views in total on the entire channel and for the entire time. Only then will monetization start working. If you have received the required number of views, proceed to the next step. On the Monetization page, accept the terms of the affiliate program. To do this, click the "start" button, put a tick in the window that opens, indicating your readiness to work with advertising concepts, carefully read the agreement in order to form a detailed idea of what you have to work with. Then click the "I accept" button.
Step 3
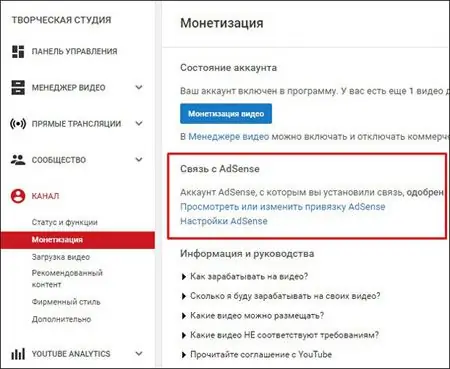
The next step is to link your account to the Adsense service. Go back to the "Monetization" section, go to the second point and click the "start" button, then go to the Adsense platform using the "next" button. After that, log into your Google account. If everything went right, the system will redirect you to the next item, where you need to specify the language of your content. Next, click on the "save and continue" button. Then fill in the contact information, in which you need to enter your first name, last name, residential address (if the address is not included in one line, transfer it to the second). In addition, you must fill in whether you want to receive notifications, polls, participate in research, and so on. Next, click on the "send request" button. In the window that opens, read all the terms and conditions, check the box and accept the form. So, you have established the connection of your channel with the Adsense service.
Step 4
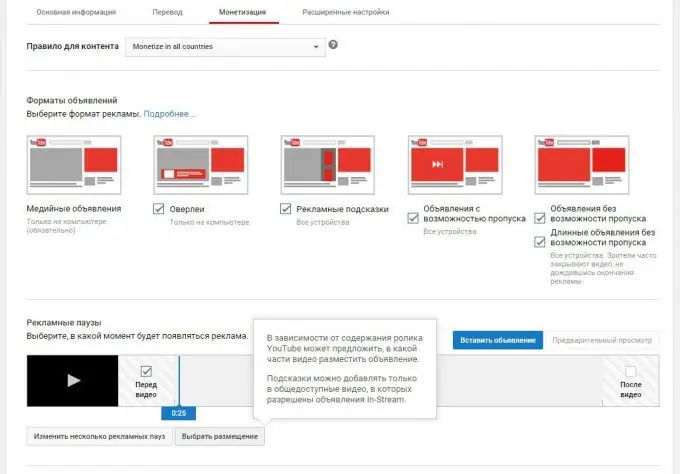
Go back to the "Monetization" field again. In the next paragraph, we choose what kind of advertising you would like to see on your channel. Click on the "start" button. If you want absolutely different advertisements to be broadcast on your video file, indicate this in the window that opens.
Step 5
Make sure the channel has 10,000 views. If everything is correct, then wait for the verification of your data and feedback from the service. As a rule, this takes no more than a month.


