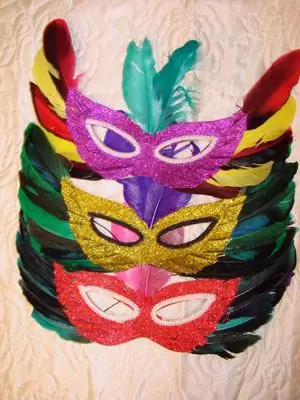
Holding any holiday, and even more so a masquerade, is desirable or necessarily involves the presence of a mask. However, it is not always on store shelves, despite all the variety, that you can see the mask you would like. In this case, it is quite possible to make a masquerade mask yourself.

It is necessary
colored cardboard, compasses and a ruler, scissors, glue, colored paper, glitter and all kinds of colorful markers, felt-tip pens, bright pens
Instructions
Step 1
Decide on the type of mask you intend to make. A variant in the form of an oval is possible, if the mask is supposed to completely cover the face. Another type is a mask in the shape of an elongated figure eight, designed only to cover the eye area.
Step 2
Take a sheet of colored cardboard and a pencil. Draw the outer outline of the mask on the back of the cardboard. Use a compass and ruler if necessary. Pay special attention to the estimated size of the mask. It should be a few centimeters larger than the face.
Step 3
Cut out the painted mask along the outer border. Make slits for the eyes.
Step 4
Now you can start decorating the product. Take colored paper. Cut small multi-colored hearts, circles, droplets from it. Let their size be 2 to 4 centimeters in diameter. For irregular shapes, these are the dimensions of the longest diameter. Using glue, glue them by the middle to the already cut mask. Let the glue dry.
Step 5
While the glue dries, take a few strips of different colored paper, about 2 centimeters wide. Cut them into thin noodles, 3-5 millimeters in length, leaving one end of the noodles uncut.
Step 6
Take the scissors, open them and slide the sharp part of the blade flat along the back of the ends of the noodles so that they twist.
Step 7
Glue the uncut part of it to the sides of the mask from the outside. To hide the places of gluing, glue flowers made of colored paper on top of them by overlaying.
Step 8
Using the same technology as when curling the ends of multi-colored noodles, round off the loose halves of hearts, circles and other details that are not glued to the mask.
Step 9
Add the resulting mask with patterns using markers, lightly brush in places with glue. Then sprinkle generously with sparkles.
Step 10
Cut a strip out of thick cardboard, wrap it with foil and glue it to the side of the mask from the inside. This is the handle by which you can hold the mask. Instead, you can tie an elastic band, due to which the mask will stay on the face. To do this, in the finished product, you will have to make two holes on the sides using a hole punch.


